I recently insulated and encapsulated my crawlspace a few months ago. The crawlspace is about 2,000 sqft and the entire project cost me about $5,500. It took about a month of research and another month of working everyday after work and on weekends to complete this task although I will go over some tips I learned along the way that could have probably easily halved that time.
You want to do a massive amount of research before you even start buying anything. I found a number of youtube videos and random discussions online to piece together what was needed but couldn’t find anything that walked me through all the steps involved. Hopefully this guide can help fill in some pieces during your research. I would not consider this an easy task. I was lucky in that my crawlspace was relatively clean. It needed minimal repairs and our heater is located in the attic so I didn’t have to work around that.
Most of my supplies came from https://crawlspacerepair.com/ but https://crawlspaceninja.com/ was also a good resource for research as well. I got a rough estimate of how many square feet my crawlspace was and used that when buying supplies. I went with the 20mil barrier with the felt underside. The felt was a good investment I feel but you can definitily go without. The 20 mil for the floor was overkill but I would go with 12mil instead of 6mil (min building code requires). I did 12mil for the walls and it was pretty solid.
When insulating my crawlspace (which you don’t have to do either), I went back and forth on using spray foam vs foam boards. I chose foam boards with spray foam to fill in the gaps because this gave it all a cleaner look and i could access the rim joists easier for future work and repairs. Most crawlspace companies opt for spray foam and there’s certainly nothing wrong with it but can be a bit messy. Even the 15 cans I used to fill in the gaps stuck everywhere and I would absolutely recommend a tyvek suit when working with spray foam. It’s like super glue to your skin.
Most of the main supplies I bought from crawlspacerepair. I found some cheaper options mostly on Amazon but couldn’t be sure if what I was getting was quality stuff. I’m glad I spent the extra money going with an actual crawlspace company instead of Amazon for these supplies. The vapor barrier tape in particular was expensive compared to Home Depot or Amazon but was far better quality. Here’s an overview of my order from crawlspacerepair:
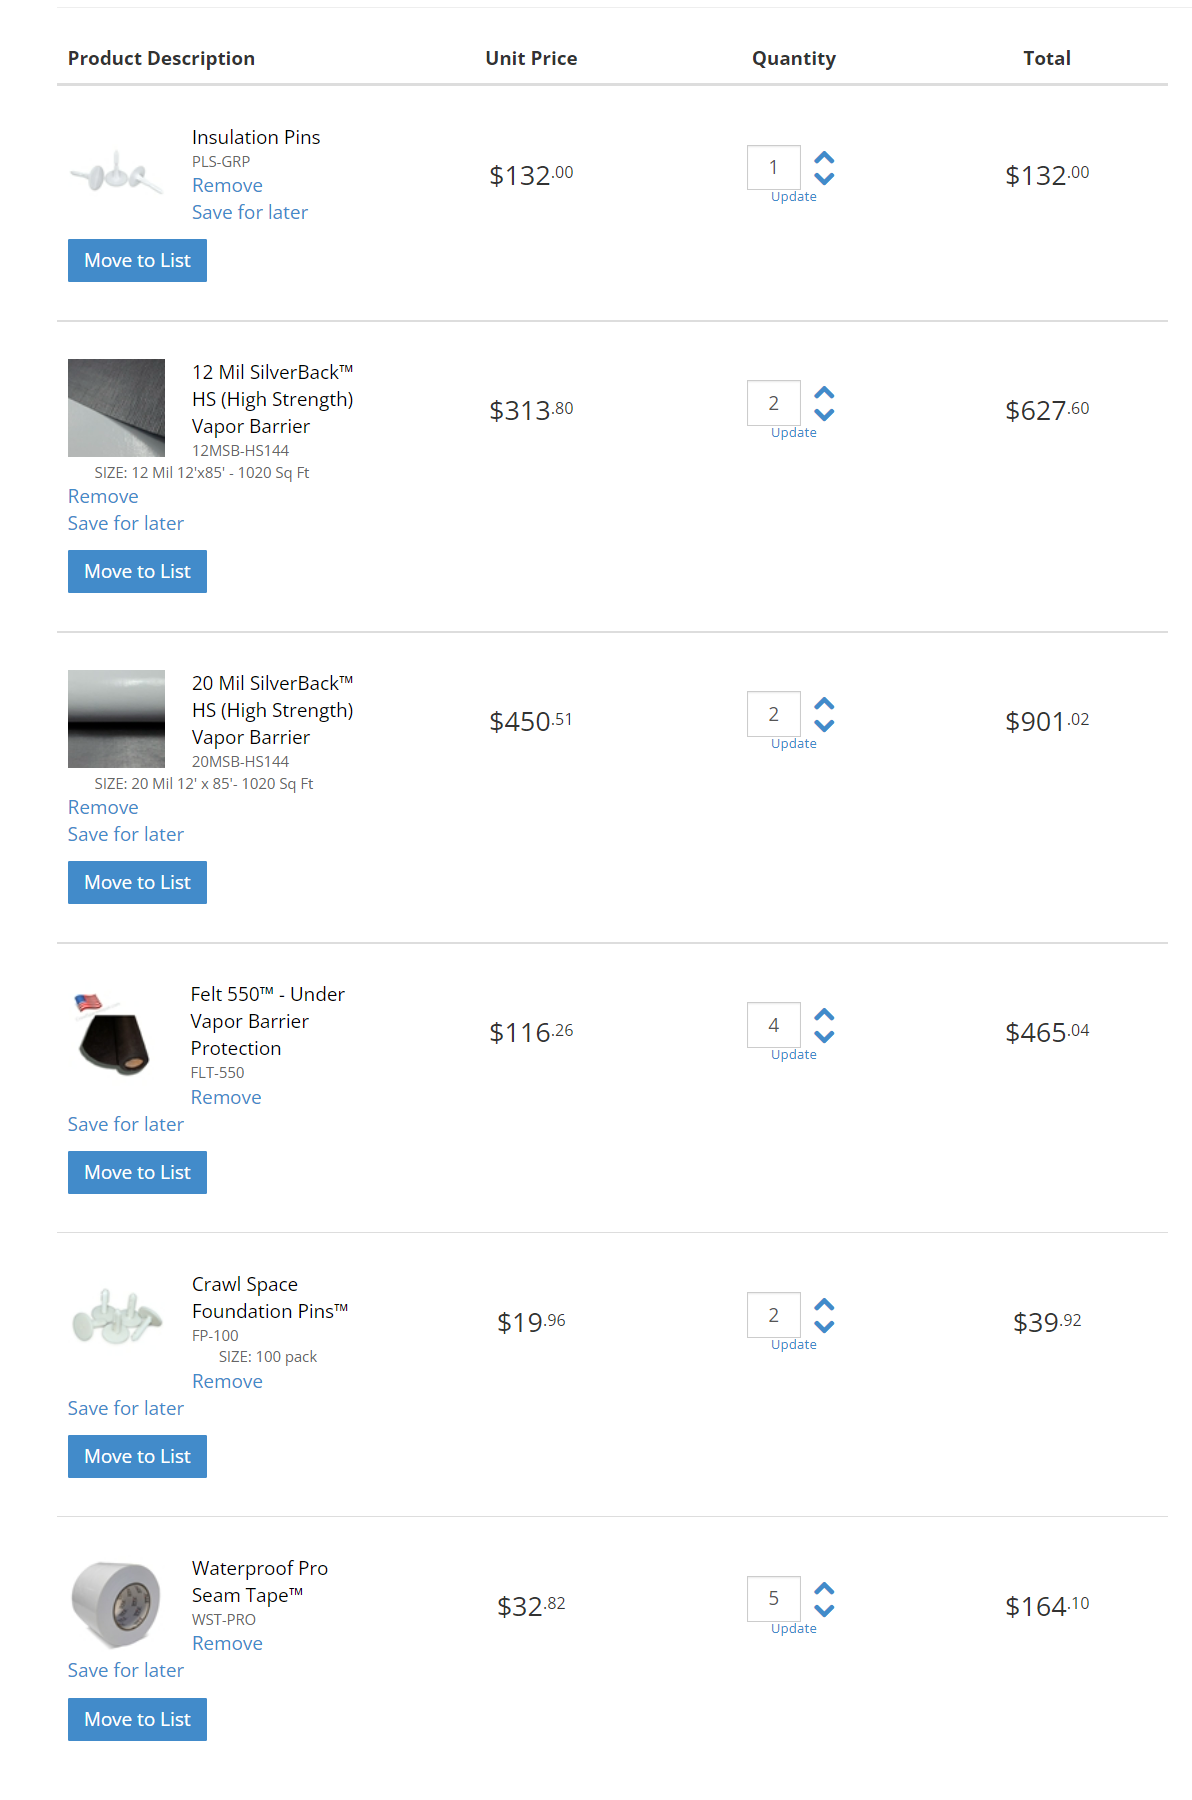
I didnt end up using the insulation pins becase they initially were to put insulation on the walls on top of the barrier as well but i ended up not doing that. I had some 20mil barrier left over but not much. The felt I had some left over but I used to make a nice soft area near my crawlspace entrance to store stuff. I didn’t need 2 packs on foundation pins either. I could have done with one pack. The tape on the other hand I wish I got 2 more rolls. I used a massive amount of tape especially around the pillars.
Most other supplies I bought from Amazon or Home Depot, whichever was cheaper. I dont want to link to specific items on Amazon but here are a few of the items I purchased for this job:
- Knee pads. I actually bought two pair so my wife could help me with certain things. You absolutely need these. Sometimes I was lazy and didn’t put them on cause I was going down there “real quick” but man even a minute or two on your knees messes them up. If you have to crawl, wear knee pads. I got nice expensive ones and cheaper ones and it was night and day. The NoCry Knee pads were relatively cheap and definitely can protect your knees fine but easily got twisted crawling around in there. On the other hand, the ToughBuilt Gel Knee Pads where double the price but super nice. Had extra large gel and supports to handle all types of crawling and moving around without having to readjust them.
- Tyvek Disposable Suit by Dupont. I bought an extra large because I wasn’t sure what size would fit. This worked fine but Large would have been a better fit. For reference I’m 5-10 170lbs. I bought 4 of these but it doesn’t hurt to have extra. They got really nasty when using the spray foam but super worth it for that and the fiberglass.
- Respirator and cartridges. You also must get this. The spray foam and mold cleaner I used are some super heavy chemicals you do not want to breathe in. I went with the 3M Reusable Respirator 7502 with 3M P100 and it was great. A little hot sometimes but well worth saving my health. You will need the gas filter cartridge not the standard particle cartridge since you’ll be working with gases that are toxic.
- I had some basic mold to take care of. During research, you can either buy basically a smoke bomb that kills the entire crawlspace and kills mold or the mold cleaner and spray and manually spray. I bought some concrobium Mold Control, some cheap kitchen scrubers, and a generic 1 gallon sprayer but do wish I went with the smoke bomb option. More expensive but easier than scrubbing a ton of joists.
- I bought a carbon steel wire brush and some mechanic shop rags. I used this to clean and wipe down all the walls, the sill plate, joists and beams, basically anything that could be wiped down. I didnt go crazy getting everything perfectly clean (it’s a crawlspace…) but i did get rid of chunks of cement left on the concrete walls left over from the builders, and a massive and I mean massive amount of dead bugs, spider webs, and bug poop. I pushed this all on the floor of my old vapor barrier to vaccum later. I wore a respirator for this as well.
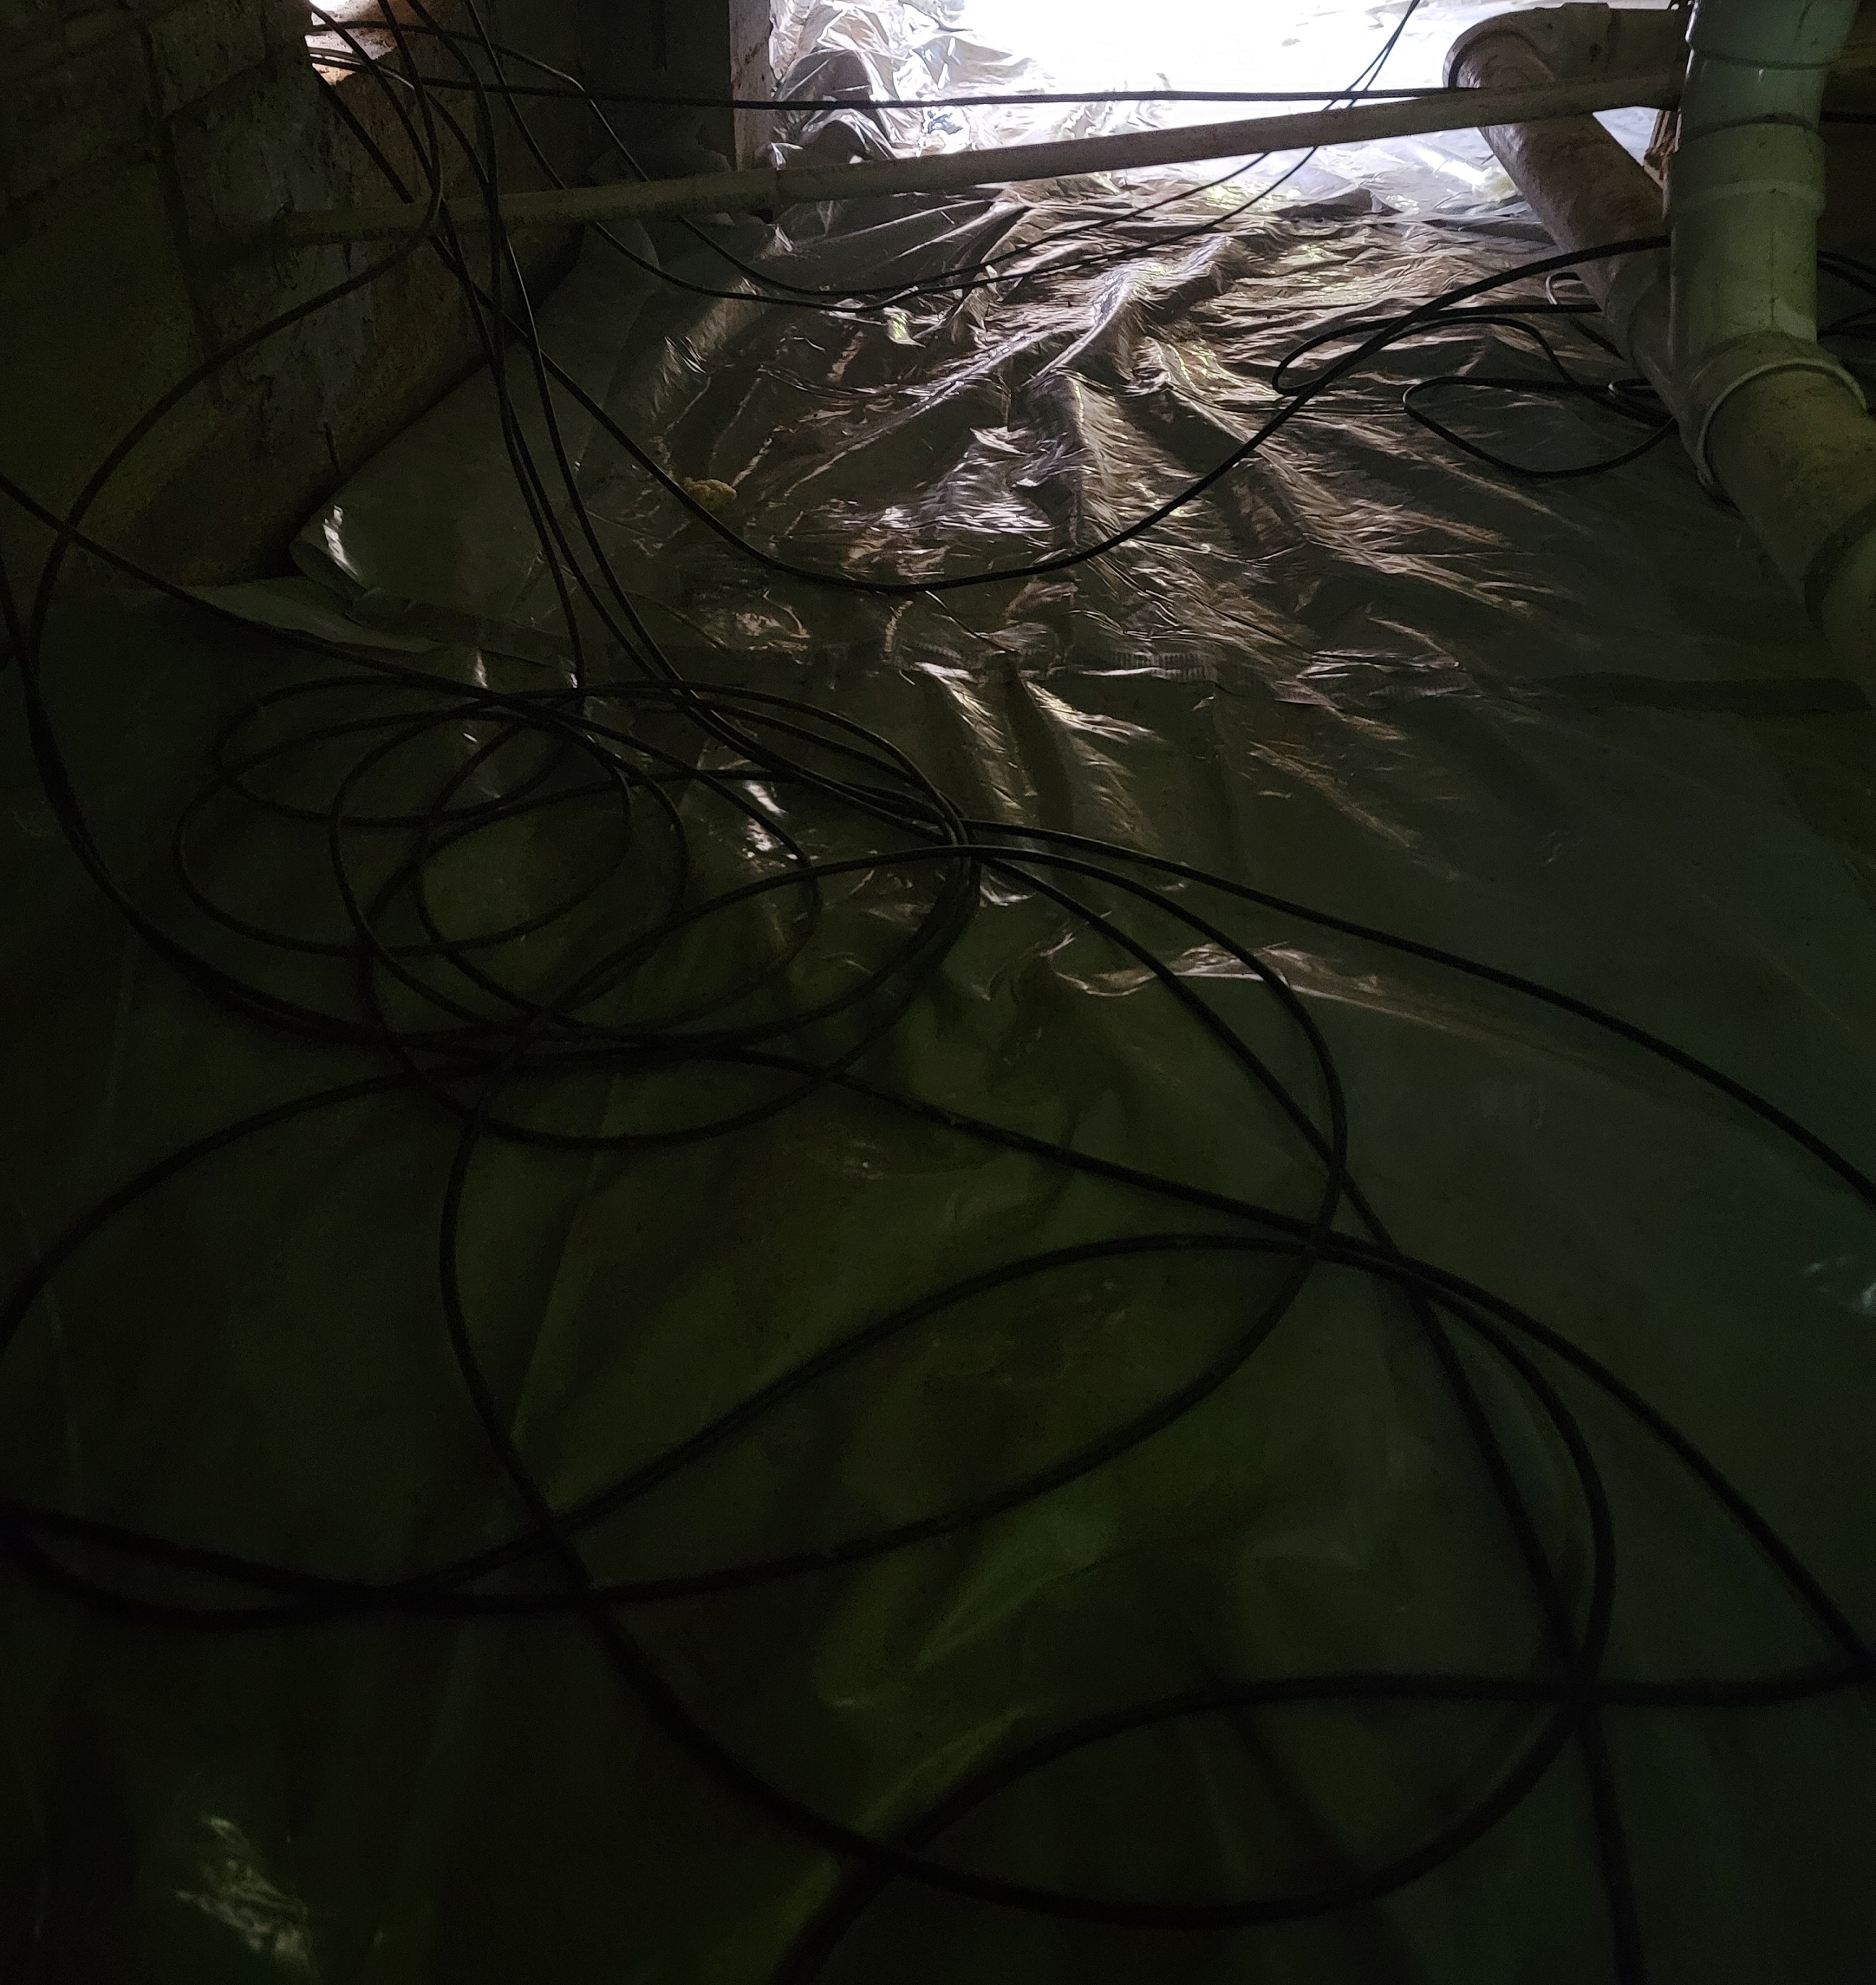
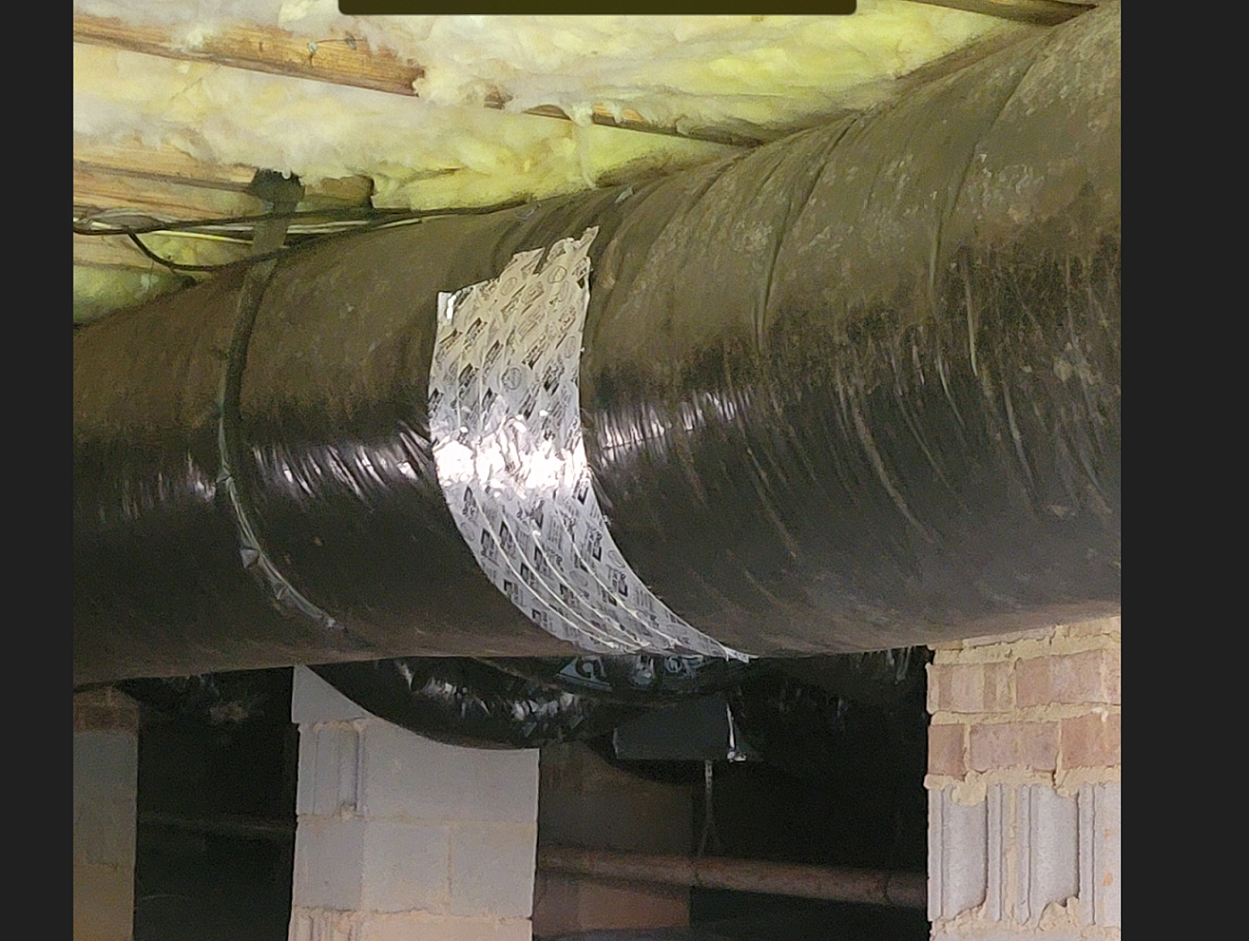
- I had some tears and loose cabling in the crawlspace. I bought some duct repair tape and taped up the tears and got some basic metal j-hooks and nails to clean up some of the wiring down there.
- I also had some damaged or missing fiberglass insulation between the joists. Some people don’t use insulation if you insulated you’re entire crawlspace but since most of it was already done, I figured it wouldnt hurt to have the extra insulation. The crawlspace never got under 60 degrees even when outside it was 15 degrees so your call. If you’re messing with fiberglass, absolutely use a tyvek suit, gloves, and respirator. If any fiberglass got on my skin it itched like crazy for the next few days no matter how much i scrubbed it off in the shower. Fiberglass really sucks, trying to go to sleep when your body itches wasn’t fun.
- After cleaning up I got a Rigid wet/dry shopvac and bought a 20ft extension hose with it to do a final clean up. Also needed a 100ft extension cord. Most of my crawlspace could fit the shopvac but there was a corner in the back that was tight and that’s were the extension hose really helped.
- Tape measure. Stanley fatmax 25ft. I had a 16ft tape measure but it was nice having a bigger one. I needed it for measuring the approximate sqft of the crawlspace, measuring the foam boards and when laying down the barrier.
- Skil 7.5 amp corded hammer drill with 100pcs bit set. This you will need to make holes in the foundation concrete. This was honestly the part I was mostly freaked about – drilling holes in the foundation seemed dangerous but once I finally had the courage to do it, it was super simple. In fact I wish i made more holes which I’ll get to when I discuss putting up the barrier on the walls. The bit set was overkill, you only really need a concrete drill bit to put the foundation pins in. Also need a mallet to hammer the pins into the wall.
- Great Stuff Pro pack of 12. When it comes to spray foam, you can do open or closed cell. I saw conflicting opinions but I went with closed cell since I wanted the insulation factor. I did have to run to Home Depot multiples times to get extra cans so make sure you but more than you think you need. Relatively cheap and you can return unopened ones. I also got the applicator gun which i do recommend getting as this stuff is insanely messy and the gun helps. Also get a few cans of heavy duty acetone to clean out the spray gun. spray foam only works well within a certain temperature range so check the weather when planning this project. I did it in late October/ early November in NC and it got a little cold some days but good temps for the spray foam overall.
- Loctite power grab all purpose construction adhesive pack of 12. I technically had enough for this job but wish i had 2-3 more tubes. Some people use double sided crawlspace tape for the vapor barriers on the wall but i used this cause my walls were a little damp and i read the tape wouldnt stick. It was a little bit of a pain to use this, I would just buy more tubes and use this liberally on the walls. I also needed 2 tubes of liquid nails for certain spots that were difficult or high traffic like the entrance. Or i guess you can use liquid nails throughout and that would definitely work.
- 3M worktunes hearing protector. This was overkill but I knew id need them a lot for other projects I had in mind. They are bluetooth so i can listen to music while protecting my ears. Basic ear protection will work too though.
- You will need gloves for the spray foam. It’s sticky as hell and dries like super glue so you dont want it on your skin. Initially I bought a pack of medical gloves but they tore very easily so go ahead and buy some 10 pack of cheap work gloves at Home Depot. Wish i did that at the beginning.
- I already had some, but get clothes (2-3 sets of pants/shirts) and shoes that you dont care to get ruined. I used some old work boots which may be easier to work with than regular shoes. They will get dirty but the spray foam will make a mess of you (even with the tyvek suit on).
- 100ft extension cord and work light. I mentioned the extension cord for the shopvac but it was also handy for the work light. I didnt need to go fancy, the Husky 12000 lumen portable LED work light worked great. Something small and portable works for those tight areas if you have them in your crawlspace like me.
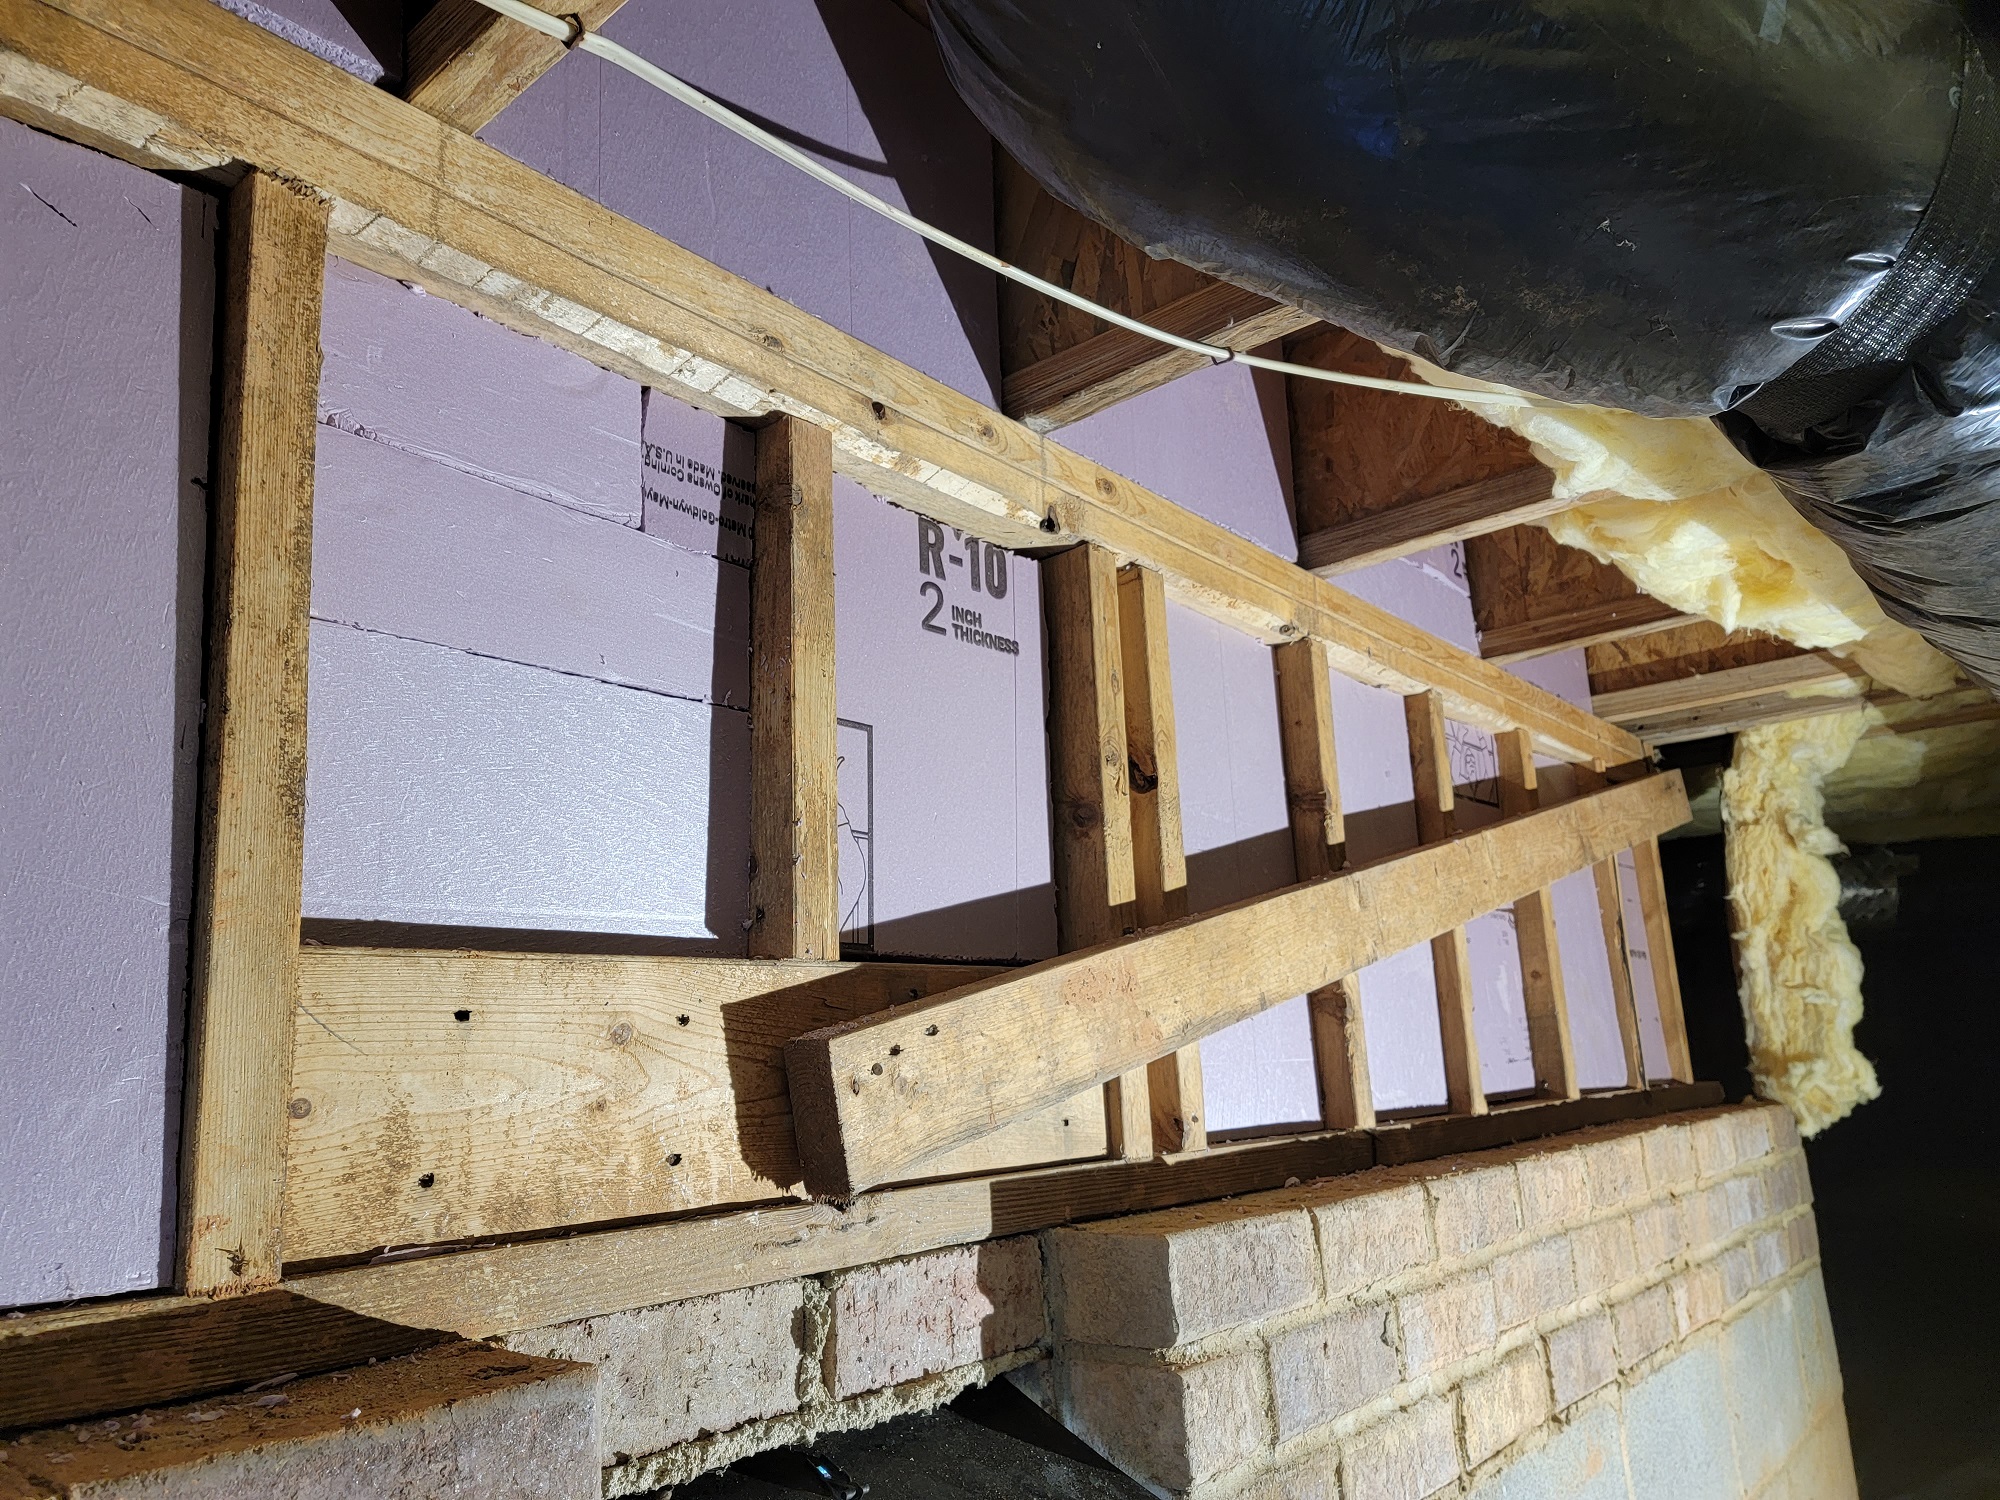
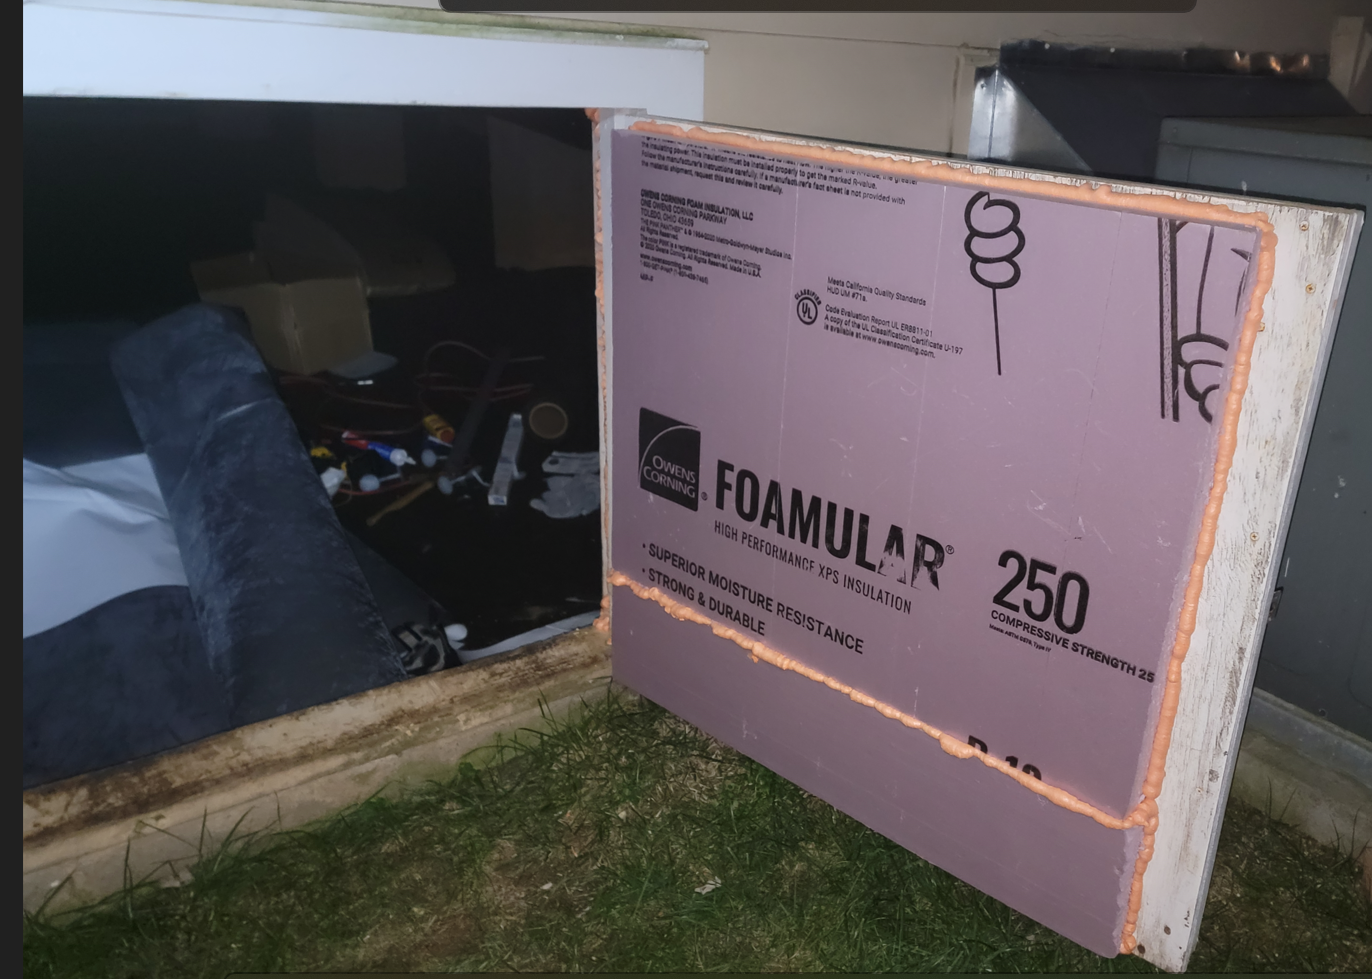
- foam board insulation. I used the Home Depot Foamular 250 R-10. The 150 R-5 was cheaper but I wanted to go all out on my crawlspace. Over the winter it got down to 15 degrees one day and my crawlspace said it was a cool 60 degrees in there. With the fiberglass insulation under the floor boards as well, this was probably overkill but I’m sure it saved a bunch on heating bills – and the floor wasnt cold to walk on in the morning. This was an immediate improvement my wife noticed so a win there (and costs justified….).
- saw for cutting the foam boards . I used a basic saw but i regretted this – this was probably why it took me 4 weeks instead of 2. Just get a circular saw. As a homeowner, you should own a basic circular saw anyways.
- headlamp. Get one of those camping head lamps and make it rechargeable. Make sure it has good battery life. I had one from years ago so cant remember where i bought it but a decent rechargeable LED one will do.
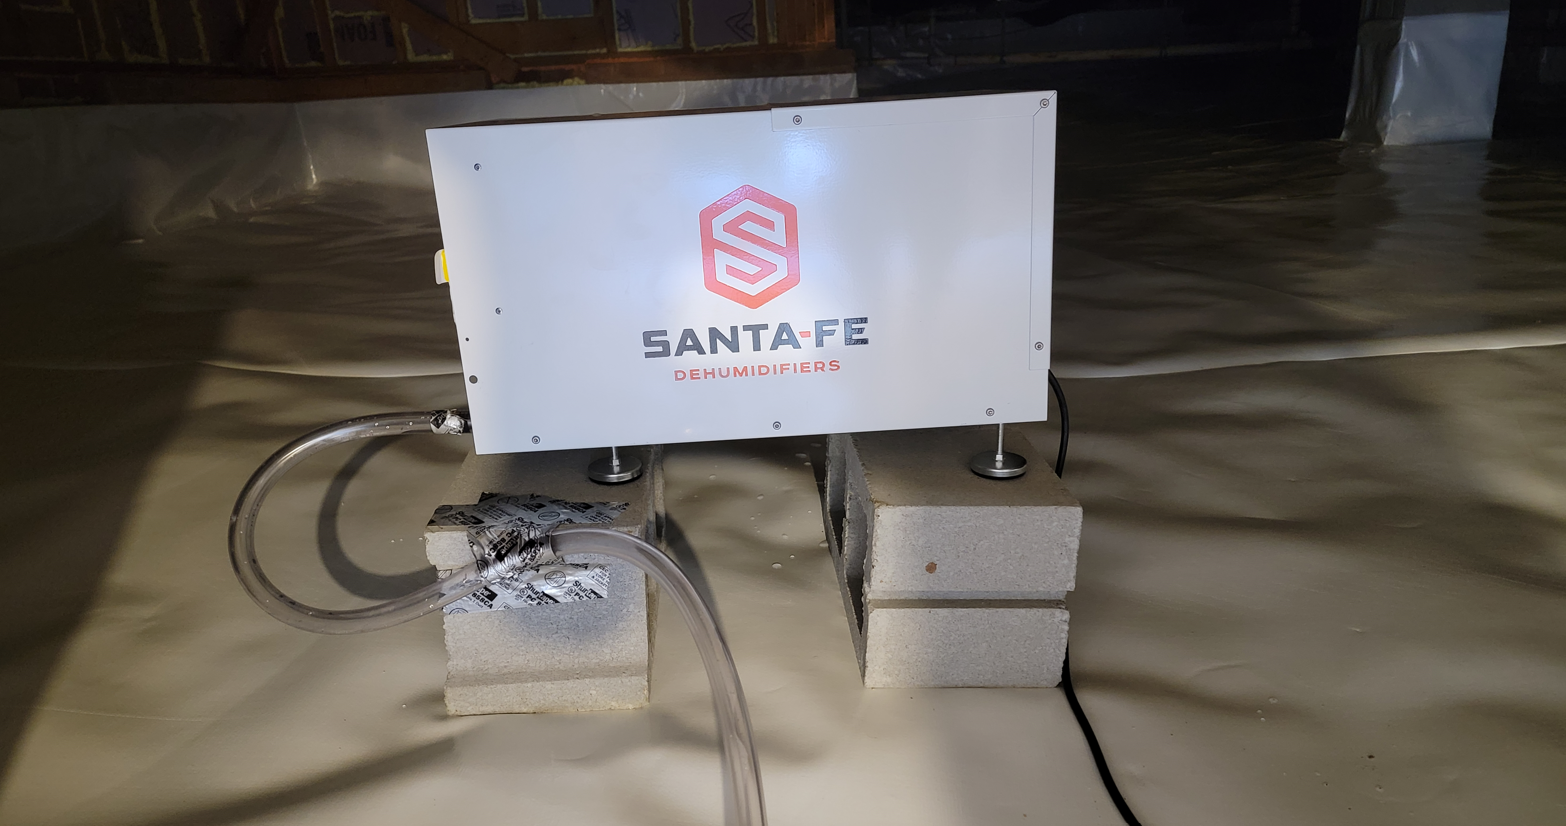
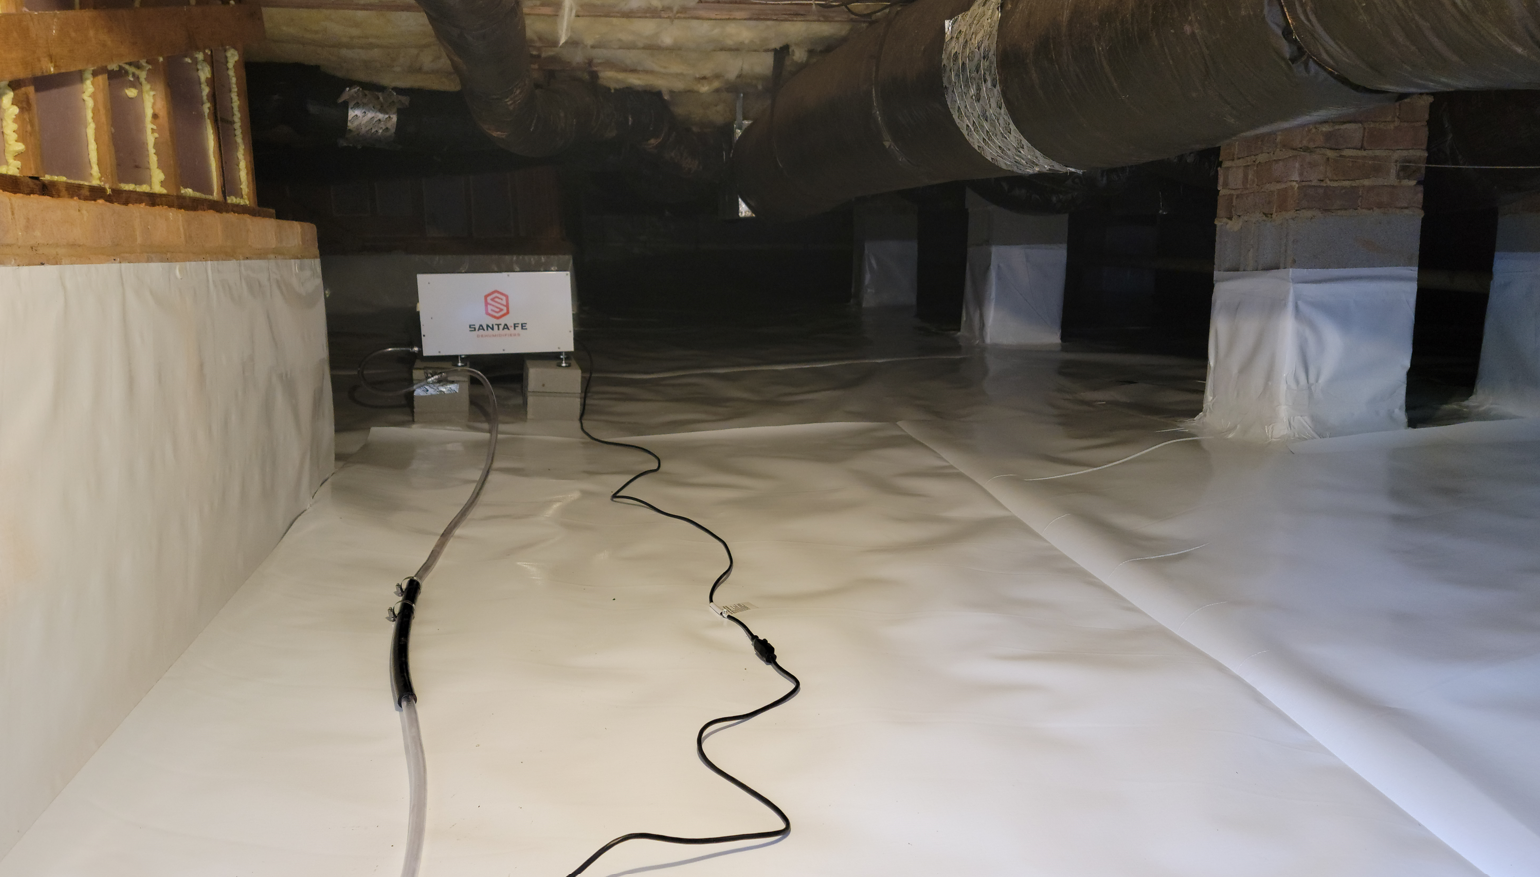
- dehumidifier. I’ll talk about this one later when i cover installing it but the one i bought was about 1,200 bucks (plus some extra supplies to setup and drain it properly).
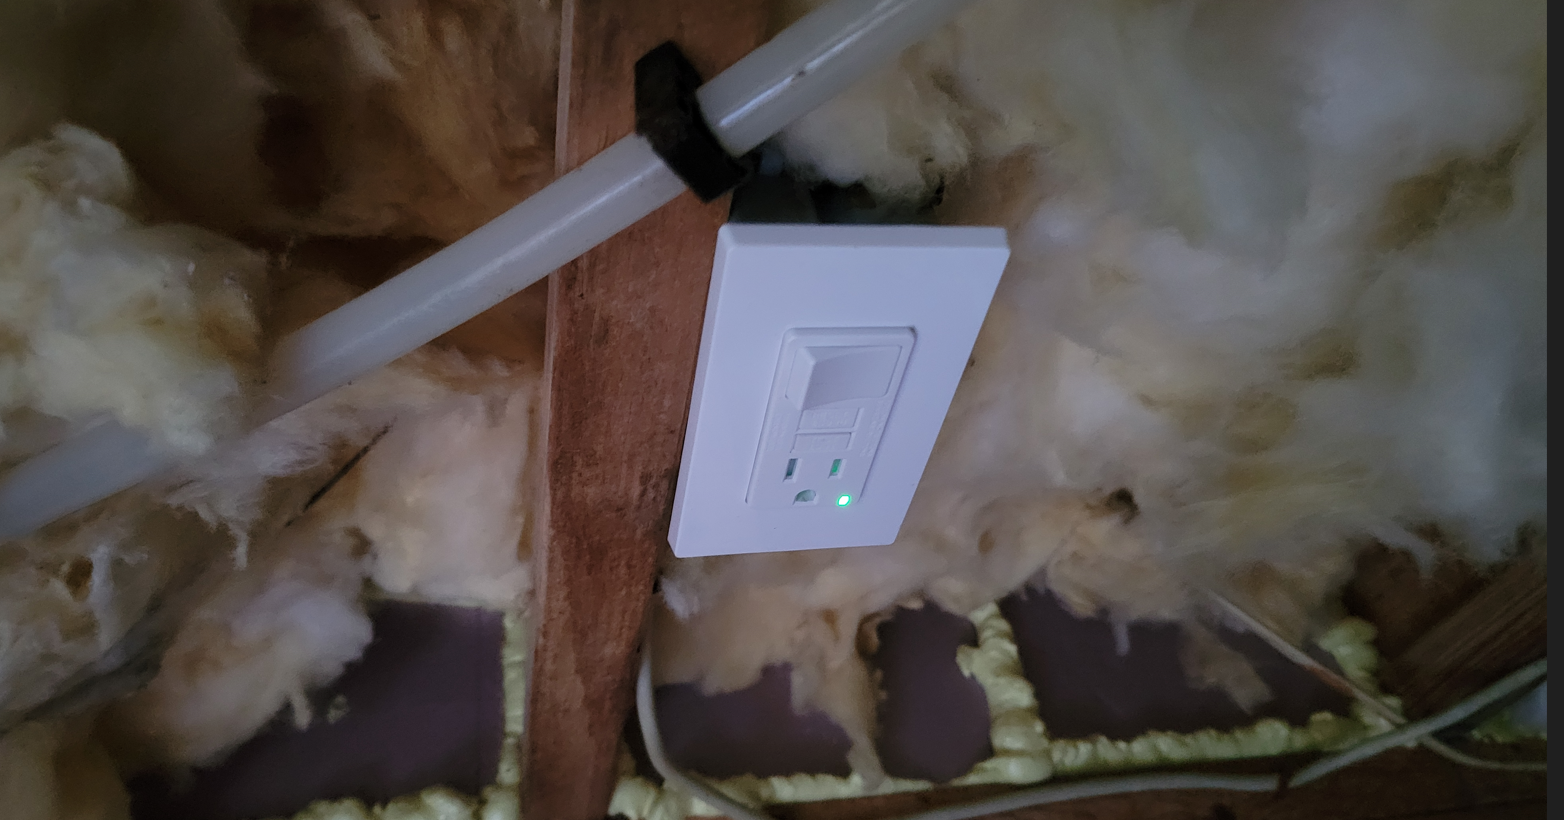
- electrical outlet supplies. I was able to tap into the crawlspace light fixture but needed a outlet junction box, and an outlet for the dehumidifier install.
- The dehumidifier was a santafe which had great reviews. Its expensive (mine was about $1,100) but it does the job pretty good. Some people add a HVAC vent and in my state you can do that but my HVAC was already old and not rated to handle the extra sqft so i opted for the dehumidifier route. Code required some kind of humidity control though either HVAC vent or dehumidifier.
I also looked into some questions I had with some wood and pipes but asking on home improvement and repair subreddits, everything was in good condition. Since you’re redoing everything in the crawlspace, it’s good to address everything before you really start tearing down the old vapor barrier and putting up the new one.
Once I was done with inital clean up and repair, it’s time to start on the foam boards. You want to put up the foam boards and foam spray on the rim joists befoire you remove the old vapor barrier. Everything makes a mess and it’s nice to get it all on the old plastic for easy clean up. I had some vapor barrier ripped up before hand and regretted it cause i had to clean up all the foam from the dirt instead of wrapping the trash foam into the plastic when removing it.
I used the tape measure to measure a bunch of rim joists, and cut to dimension. I used a basic hand saw but if I had to choose one thing to save a bunch of time it would be to just use a circle saw. My thought process was i didnt want the neighbors to hear a saw going every single afternoon for 2-3 weeks but if you have cool neighbors, then absolutely use a circular saw to cuts the boards. or a jig saw. just not a hand saw. I did talk to my neighbors afterwards and they said they wouldnt have minded the noise but oh well.
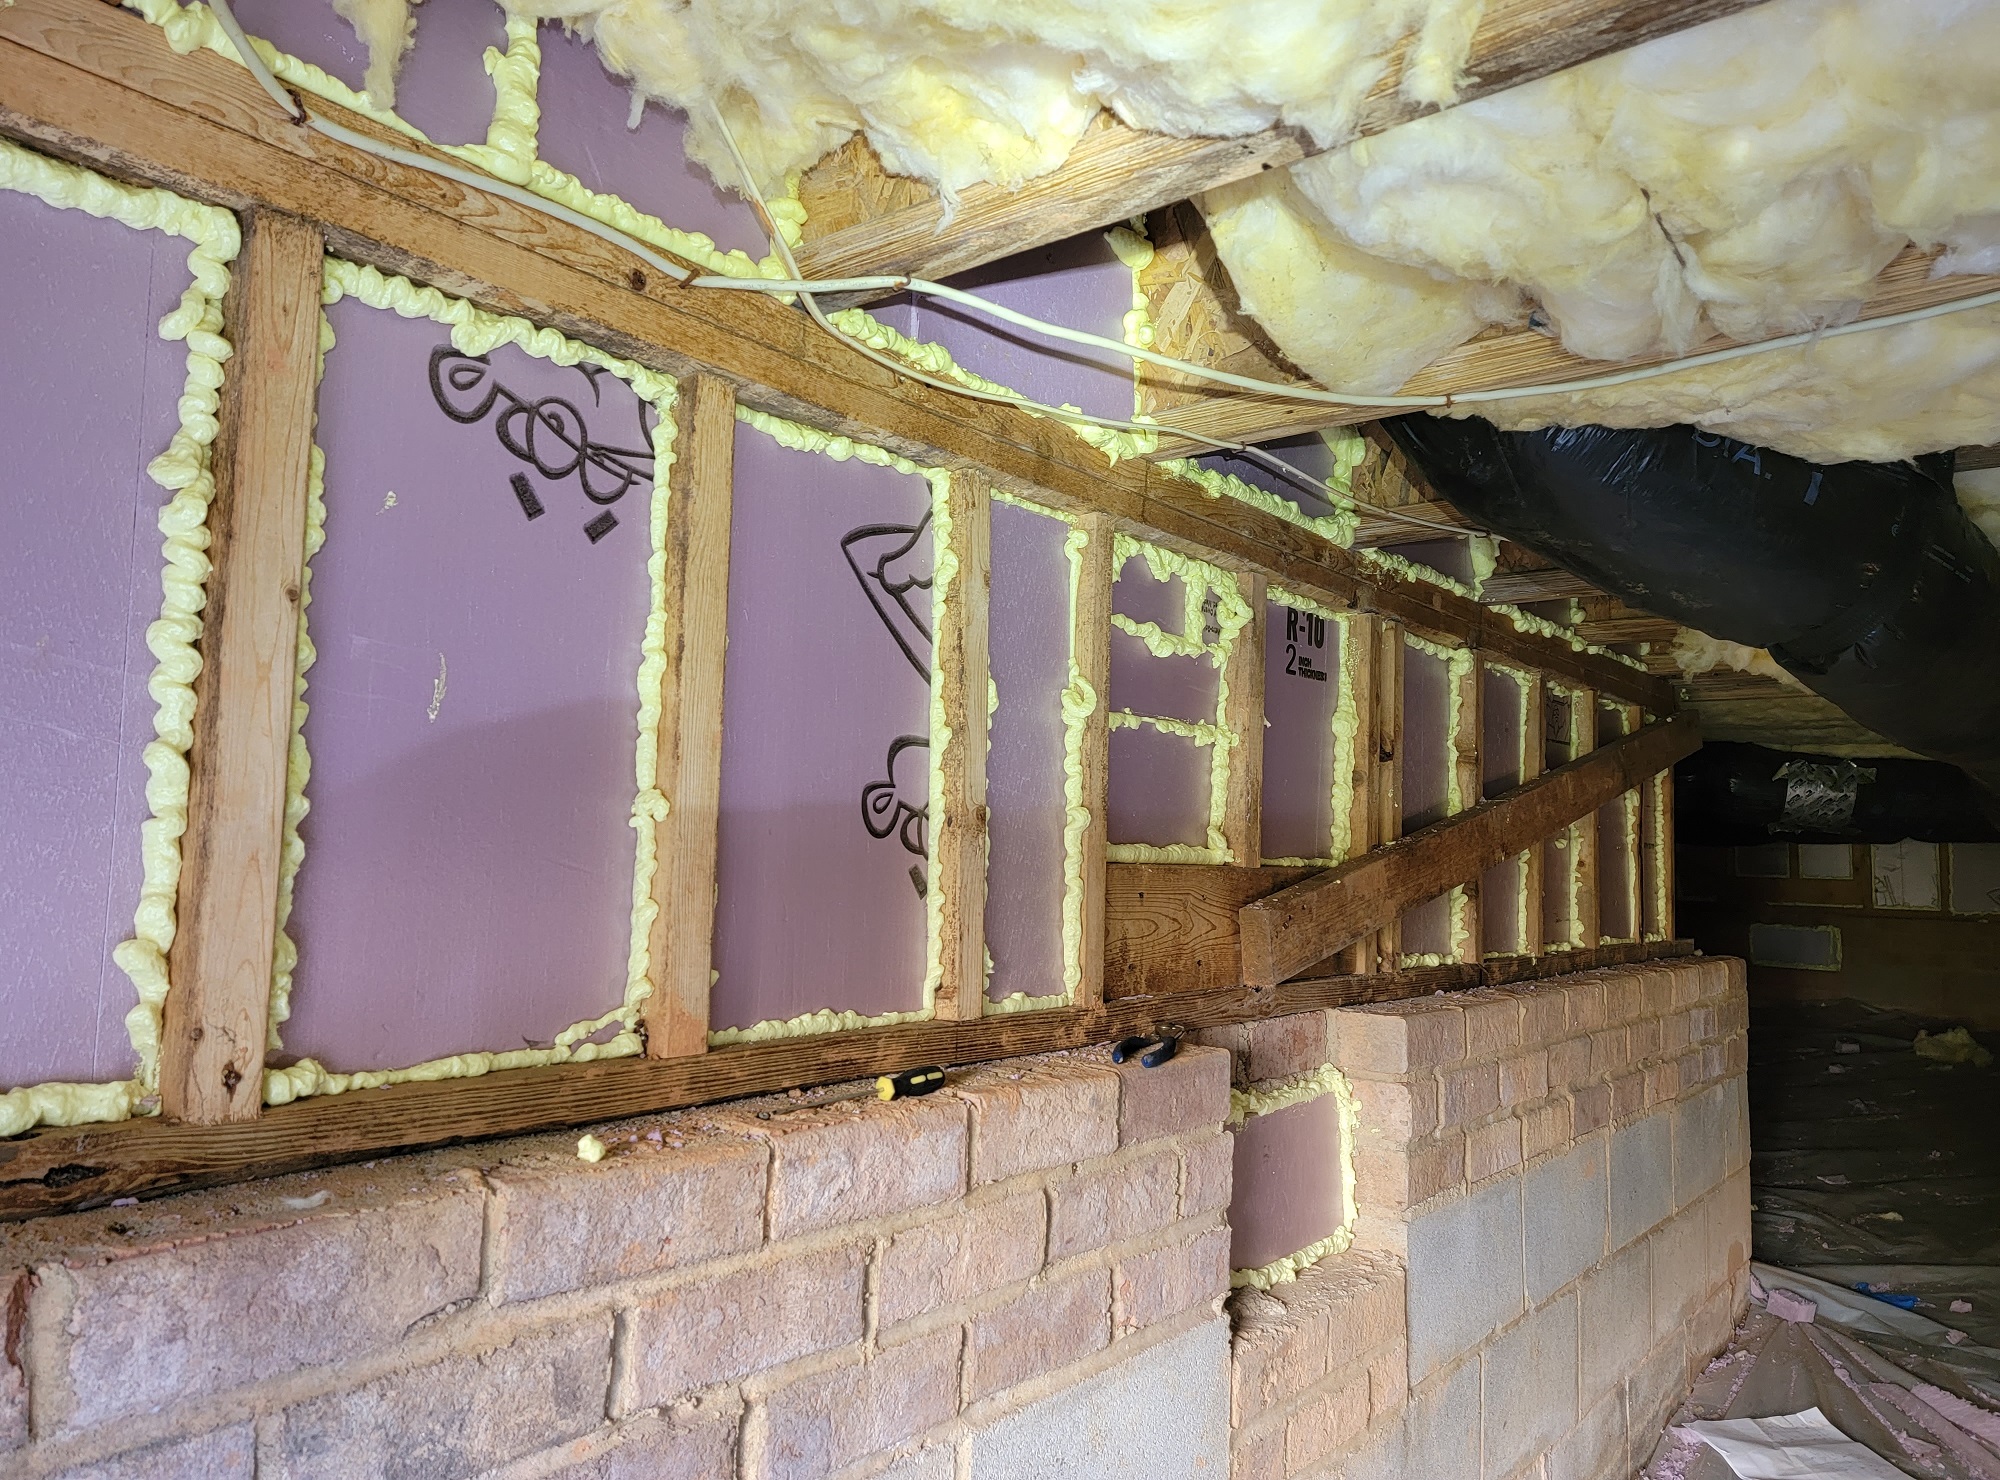
Cut the board so there’s about half an inch space on each side. Initially I cut the board so there was very little room for the spray foam but it was hard to get the spray foam in the cracks later on so just give enough room for you to be able to stick your spray gun all around the boards. The foam expands like crazy so youll be good. You want to put all the boards up before you use any spray foam though. The foam dries out inside the gun so you ideally want to keep using it all in one shot. It’s a real pain to clean out the gun with heavy duty acetone.
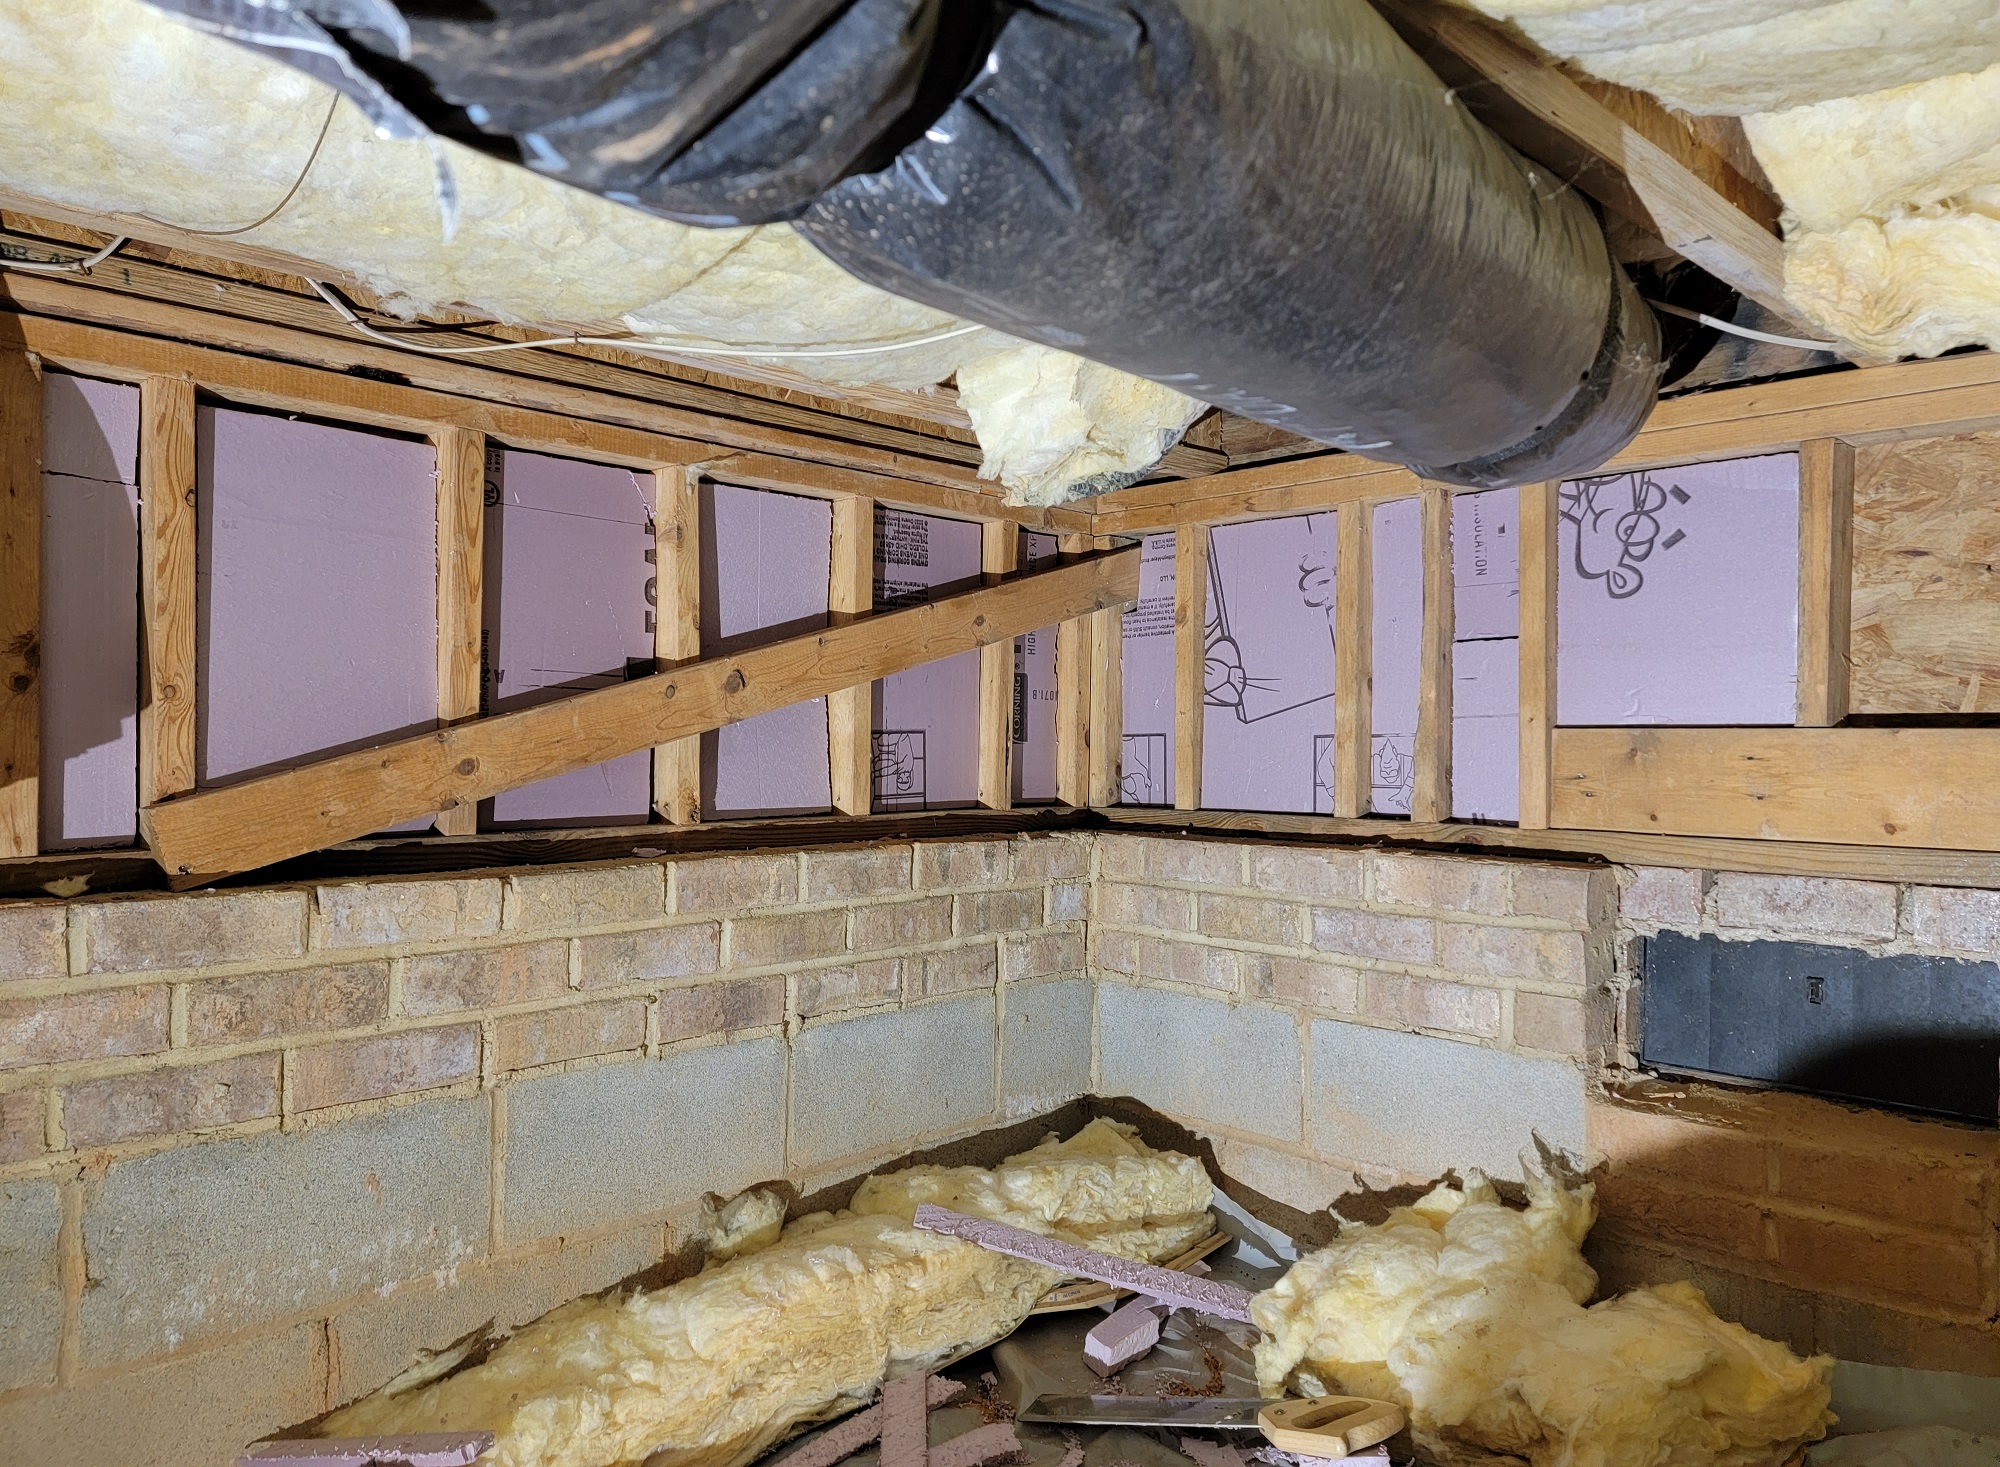
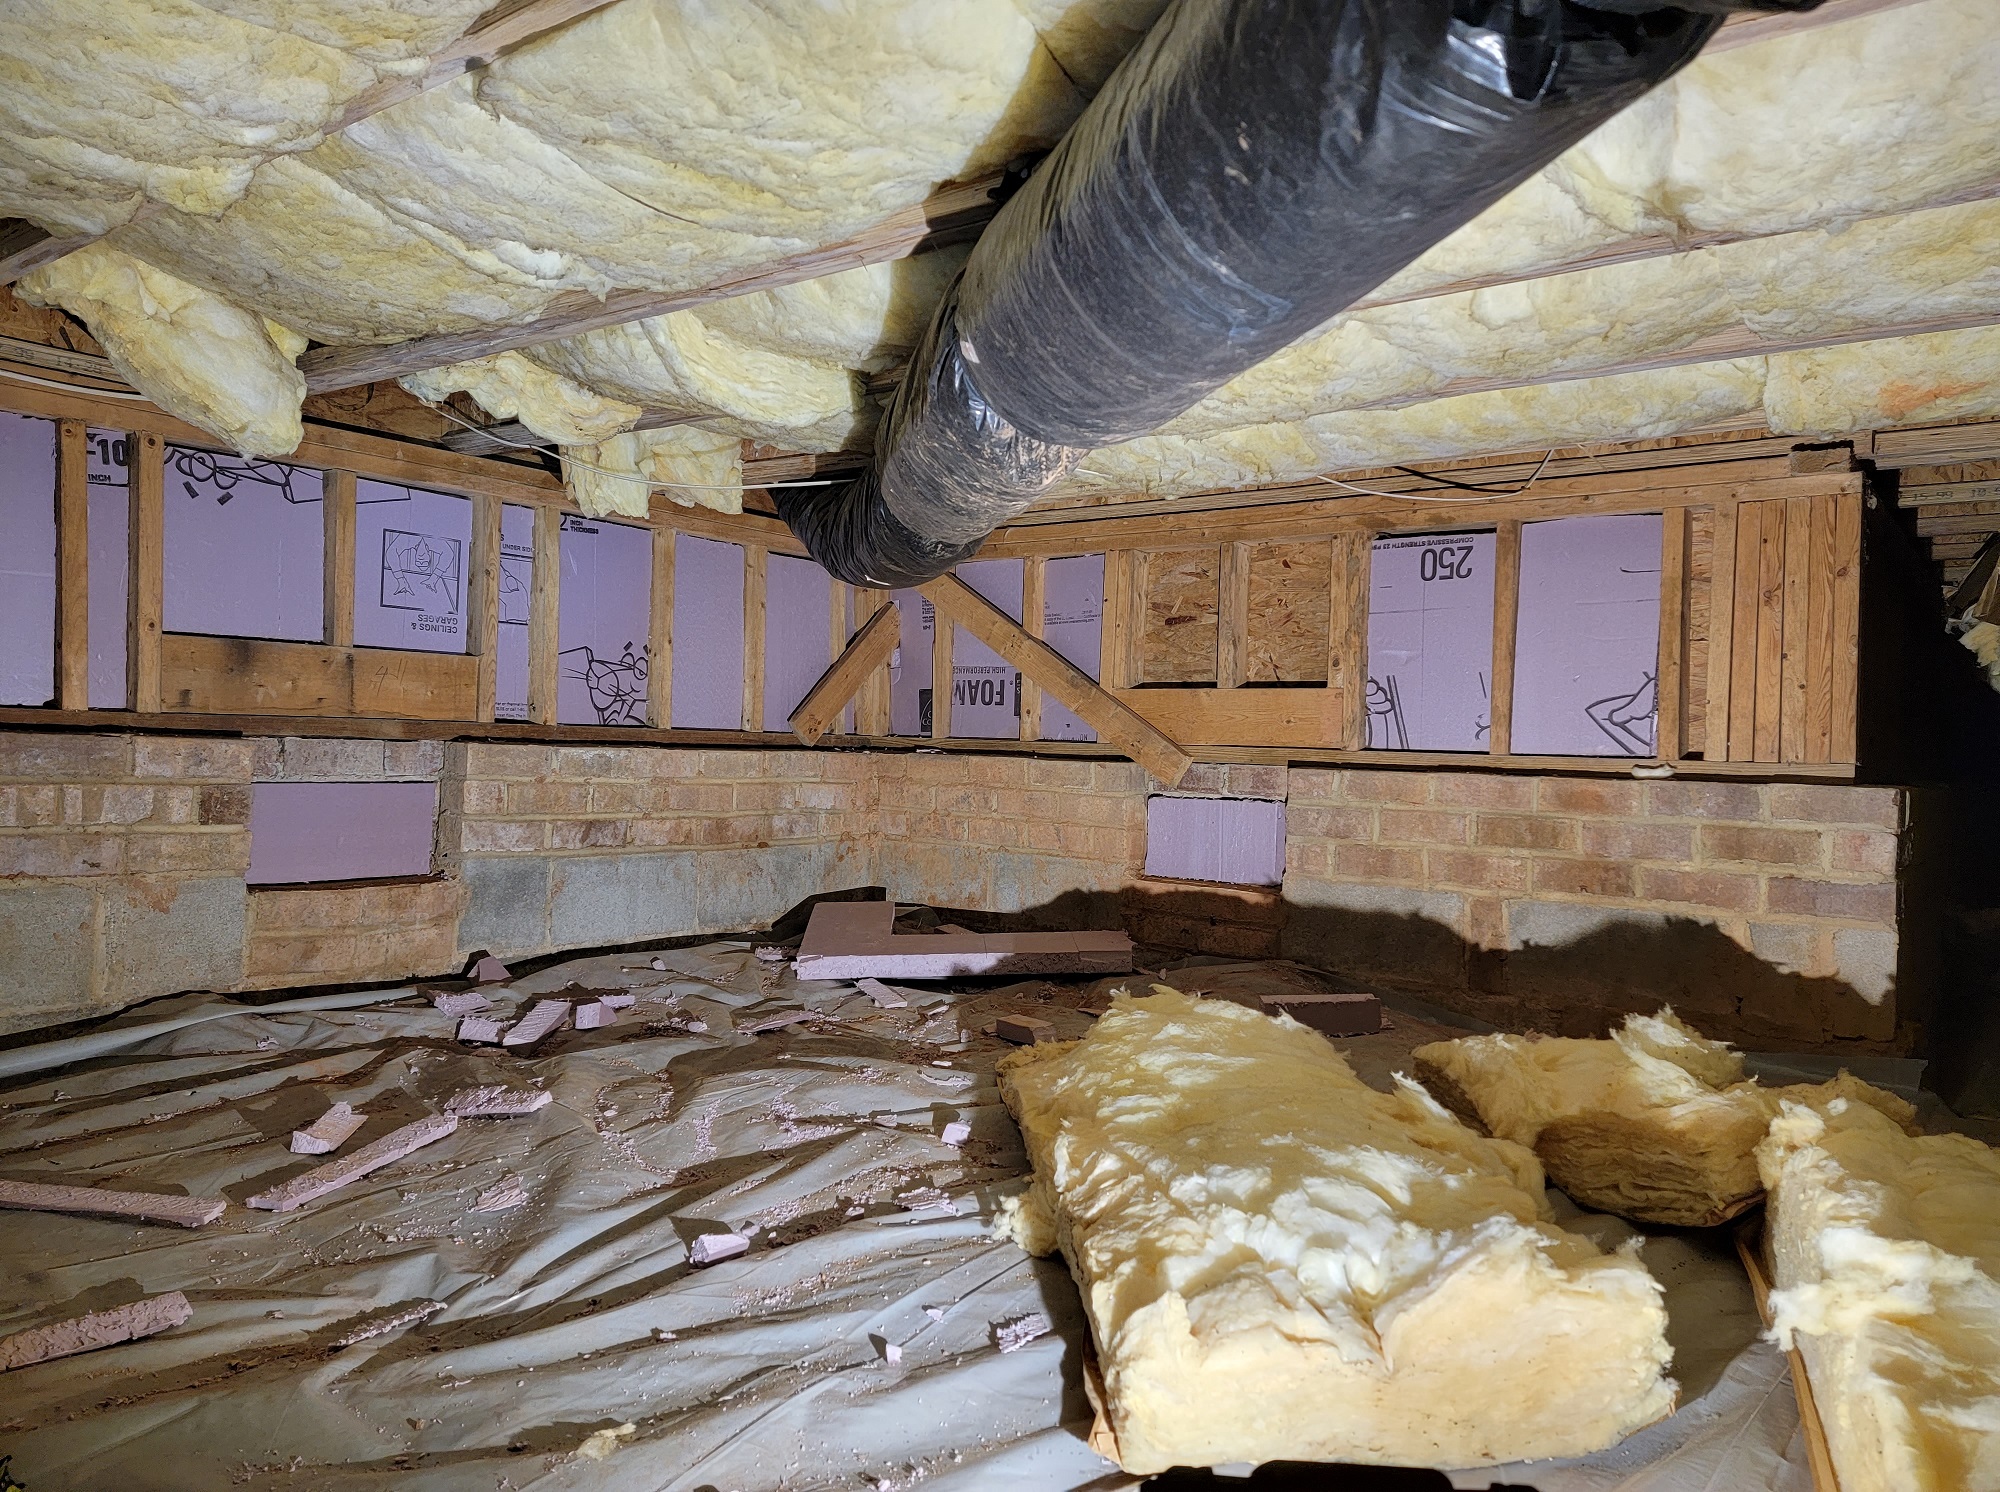
I hadnt fix the fiberglass up in the joists yet so you can see some laid out still. Atfer all the boards wer cut (which took me about a week with the hand saw…), i started on the spray foam. The gun has a knob to adjust how fast the foam comes out. It was easier to make it come out a little faster than the slowest settings but it depended on the area. Definitely spray some on some throw away junk to get a feel. It was pretty straight forward though and doesnt need to be perfect at all to get it looking pretty good. You just have to remember, this stuff is like super glue so cover as much skin as you can and anything you want to be ruined. I had a flashlight i used and it got spray foam all over it and it’s pretty messed up now. The stuff is crazy sticky you do not want it on your skin. This is a good time to close the vents too and seal them up.
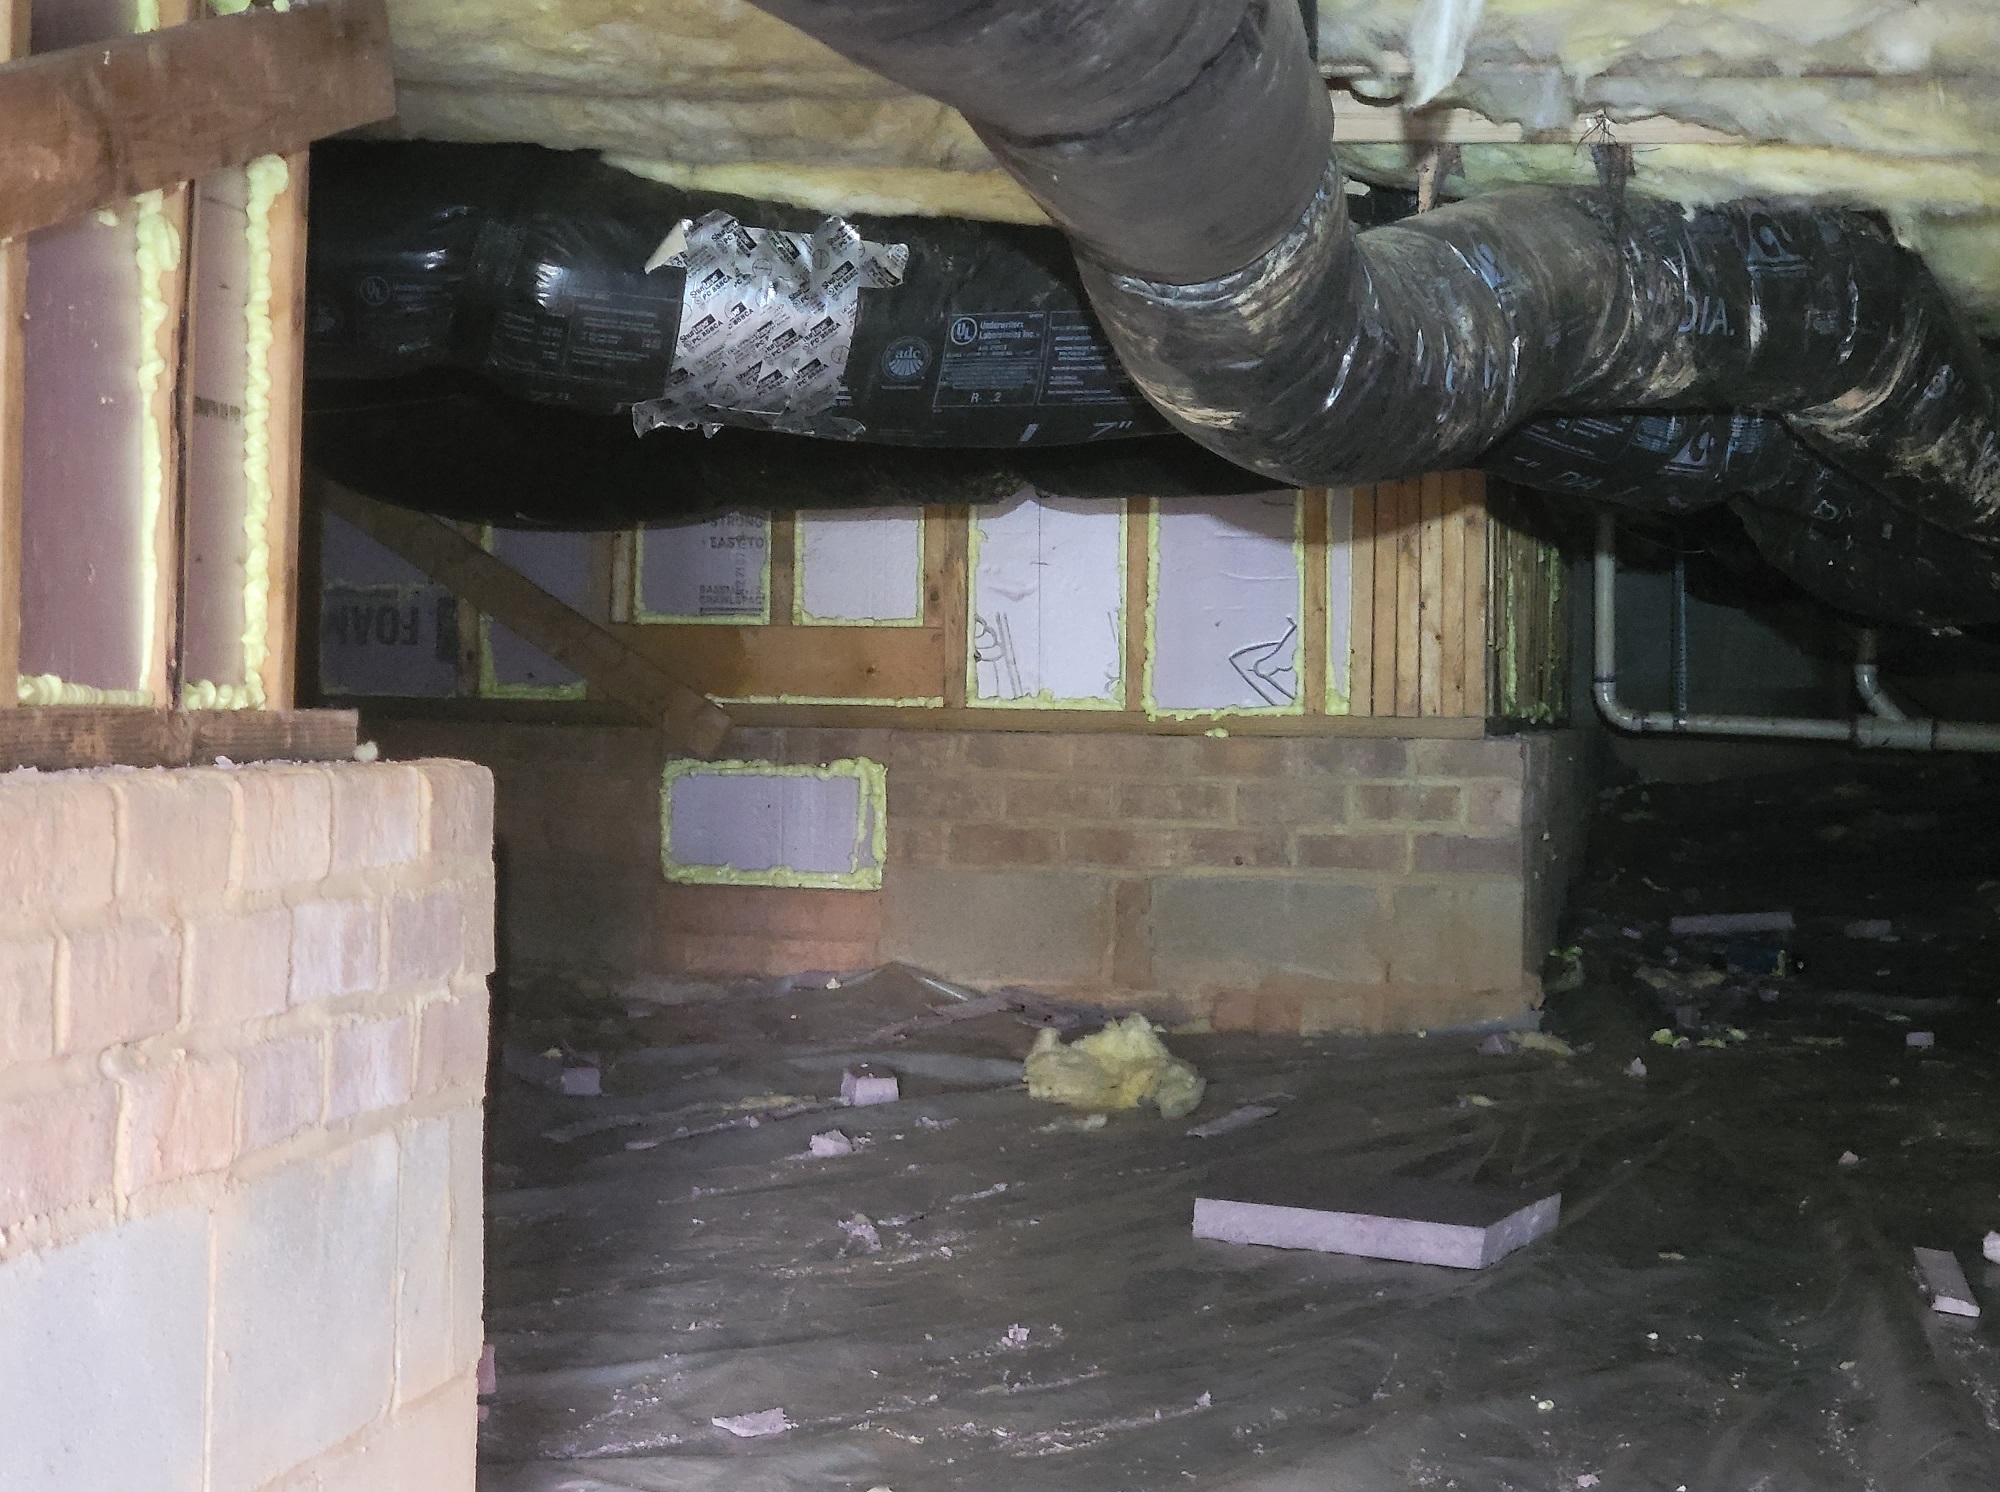
I didnt do the entrance area and door yet but didnt matter when it gets done. I just knew id be in and out and wanted that area clear as possible for the vapor barrier install.
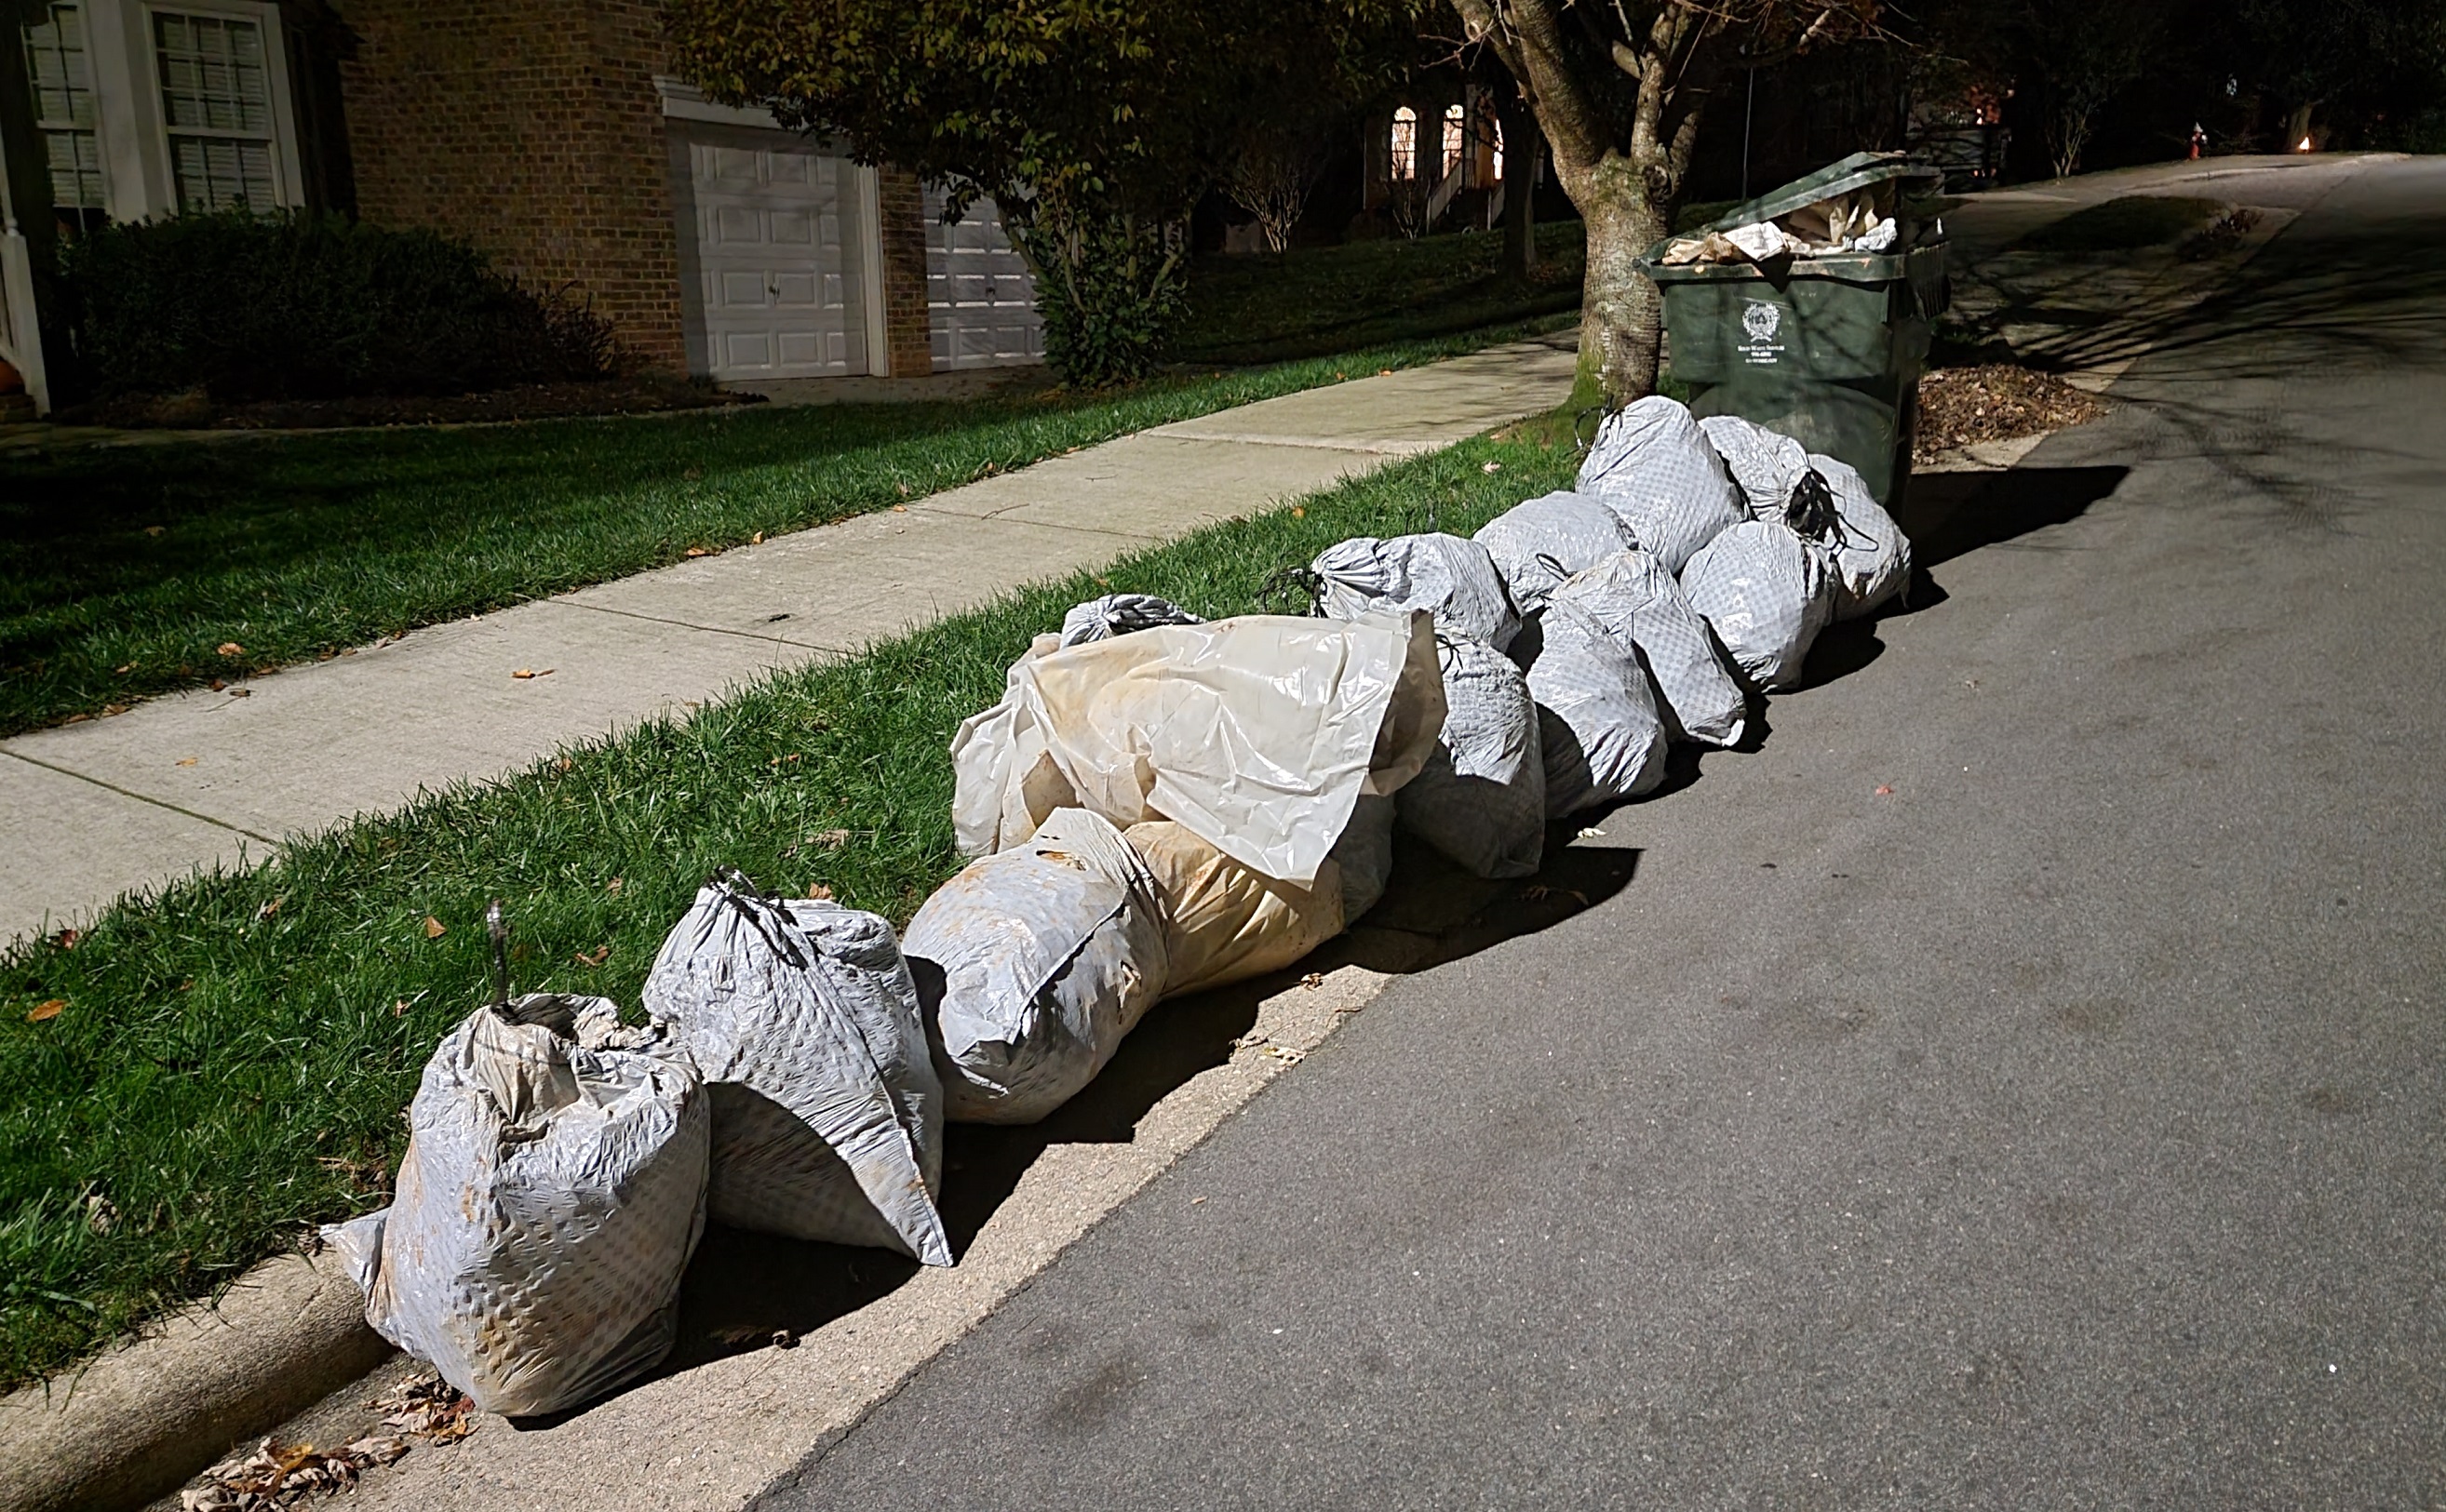
I had to remove the old beat up standard vapor barrier that was put down during construction of the house. 2,000 sqft of plastic is no joke and i took some heavy duty scissors can cut it up into many pieces. It took so many trash bags to get it all.
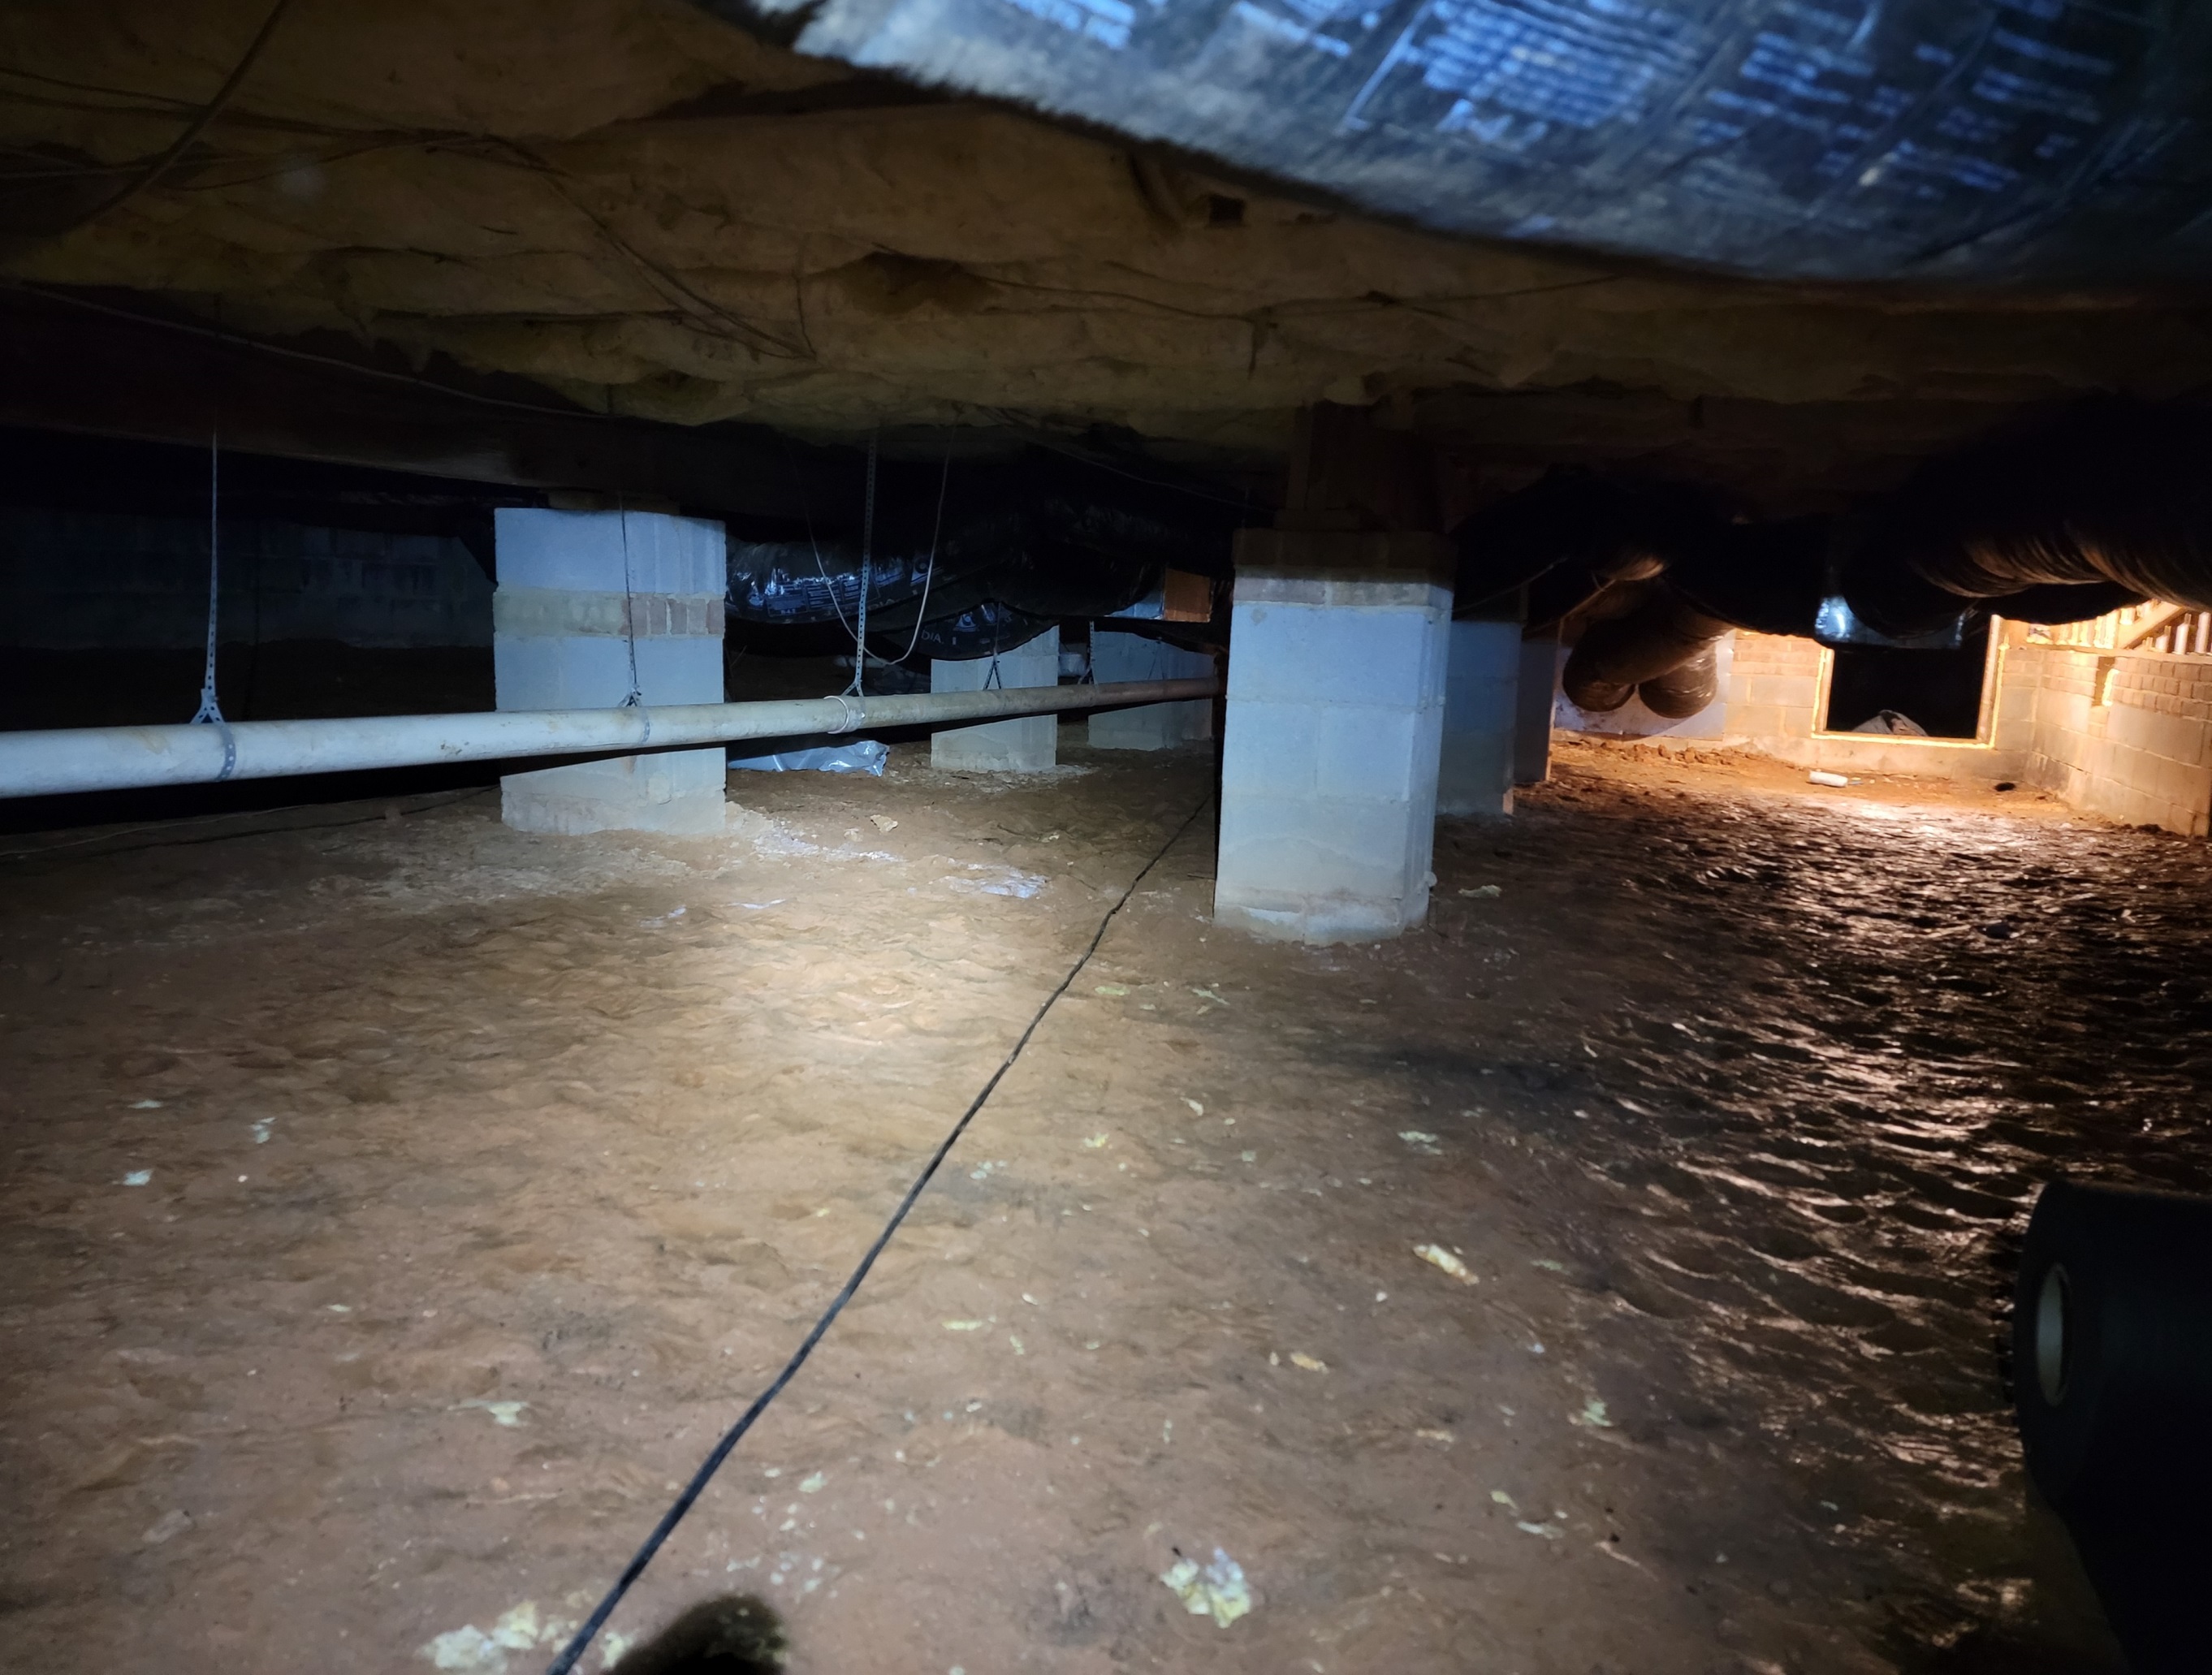
One thing i really wish i did here before i got started was even out the dirt especially against the walls. Putting up the barrier on the walls down to the ground, there were some dirt piles that made it difficult to make it flat and look great. It also helped with the glue and not tearing the barrier off the walls before you get the foundation pins in. Spending some time here prepping really makes a huge difference so spend as much time as you need cleaning, repairing, and evening out the dirt especially near the walls and corners.
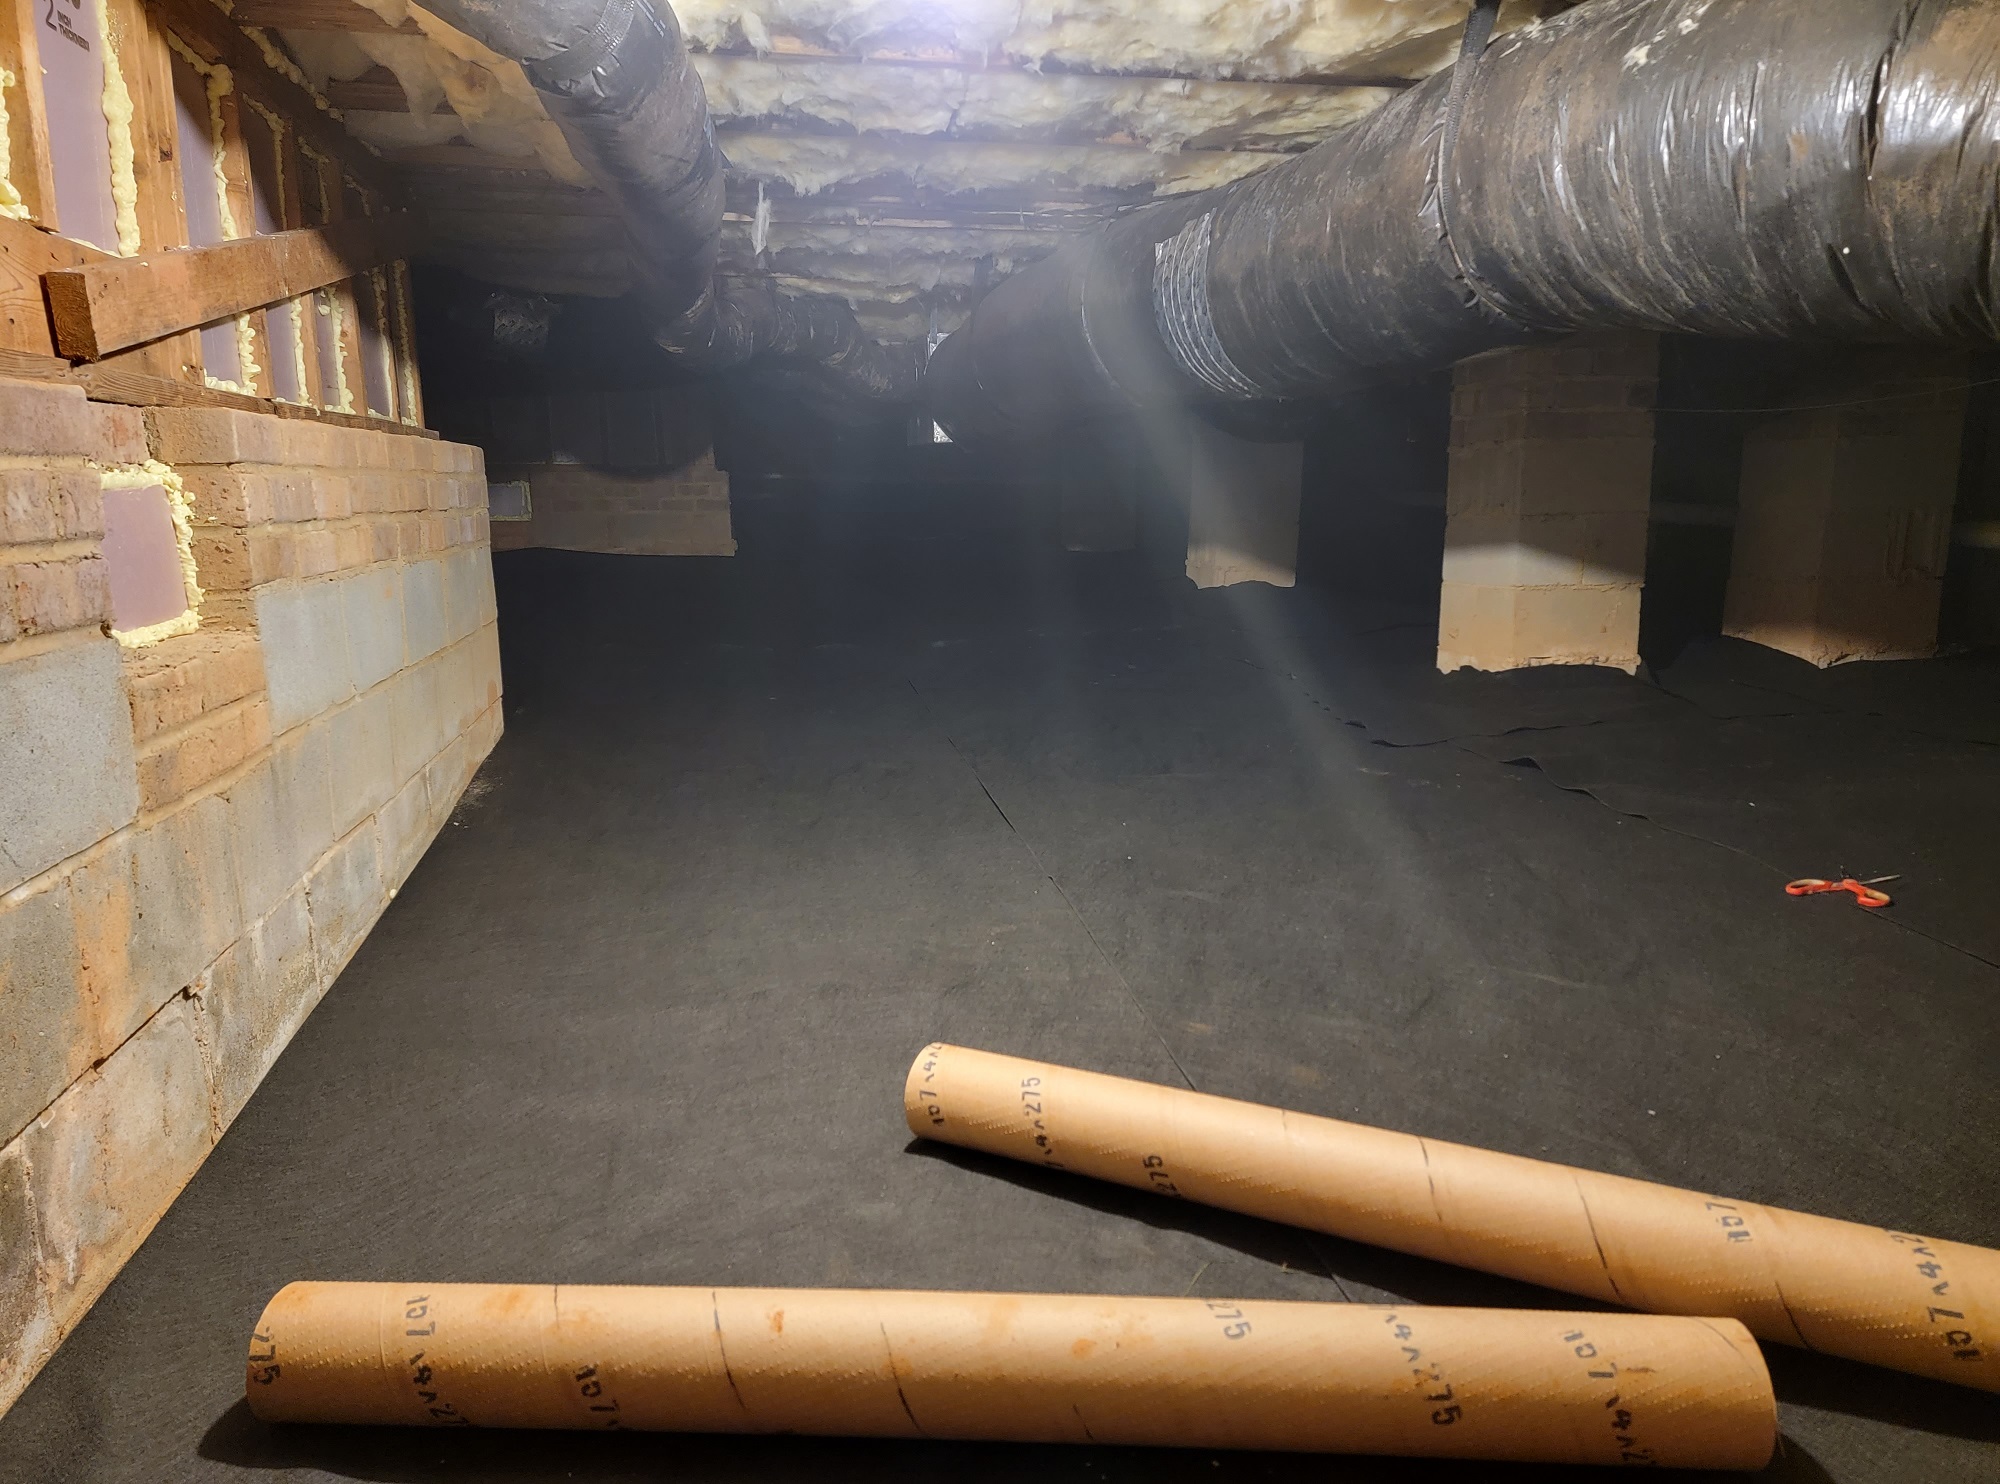
Now that everything was cleaned, i needed to put down the felt. This was a big part of the process for me because rolling out the felt was super straight forward but made the crawl space look really nice. Once the felt was laid down, i could finally see the end goal and how nice it was all turning out to be. I tried rolling in areas that allowed me to cut the felt as little as possible. I also overlapped the felt about 3 inches but wasnt really a big deal.
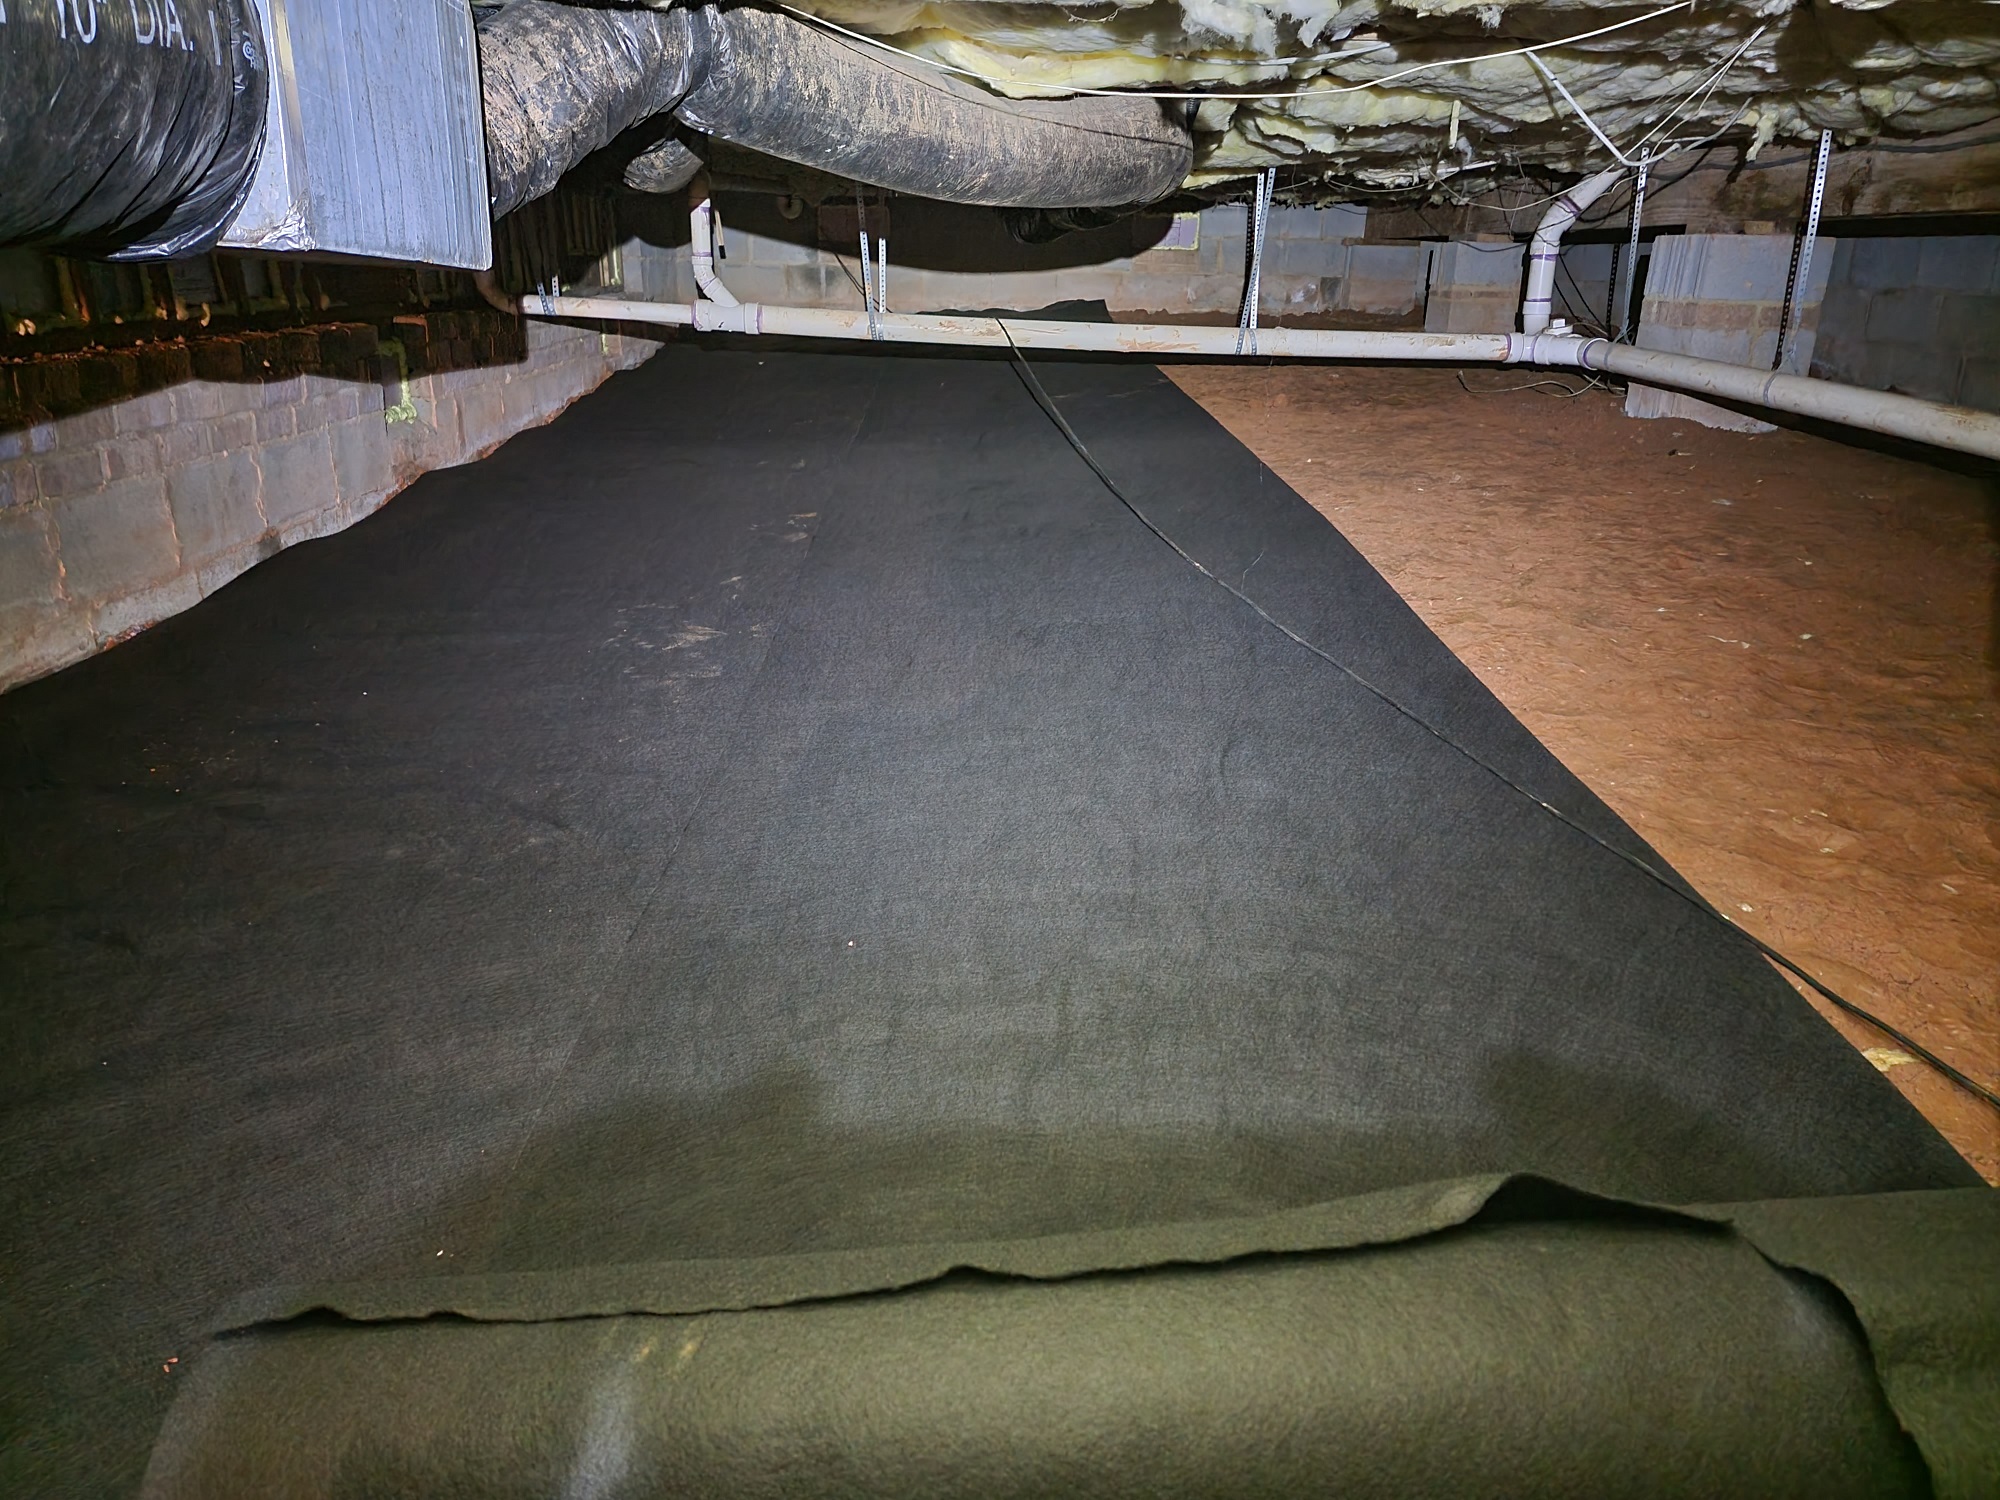
filling up around the columns was a pain. Just make sure to plan ahead on how your going to cover the busy areas and you should be good. You can see in the last picture above on the top right I had some over lapping pieces i put together to get that last little bit. The felt isnt needed to encapsulate, but im glad i put it down, makes me feel like i got the premium encapsulation option and i used left over felt to make a nice storage space that will protect the vapor barrier.
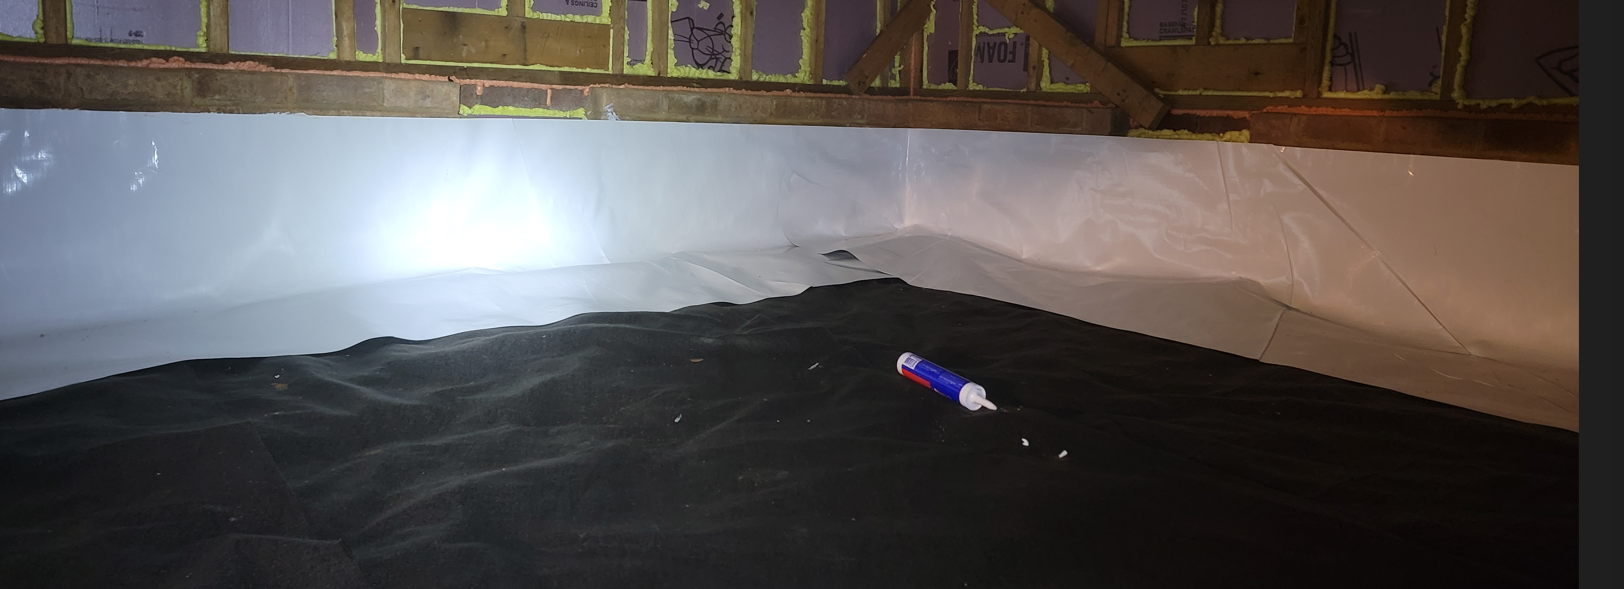
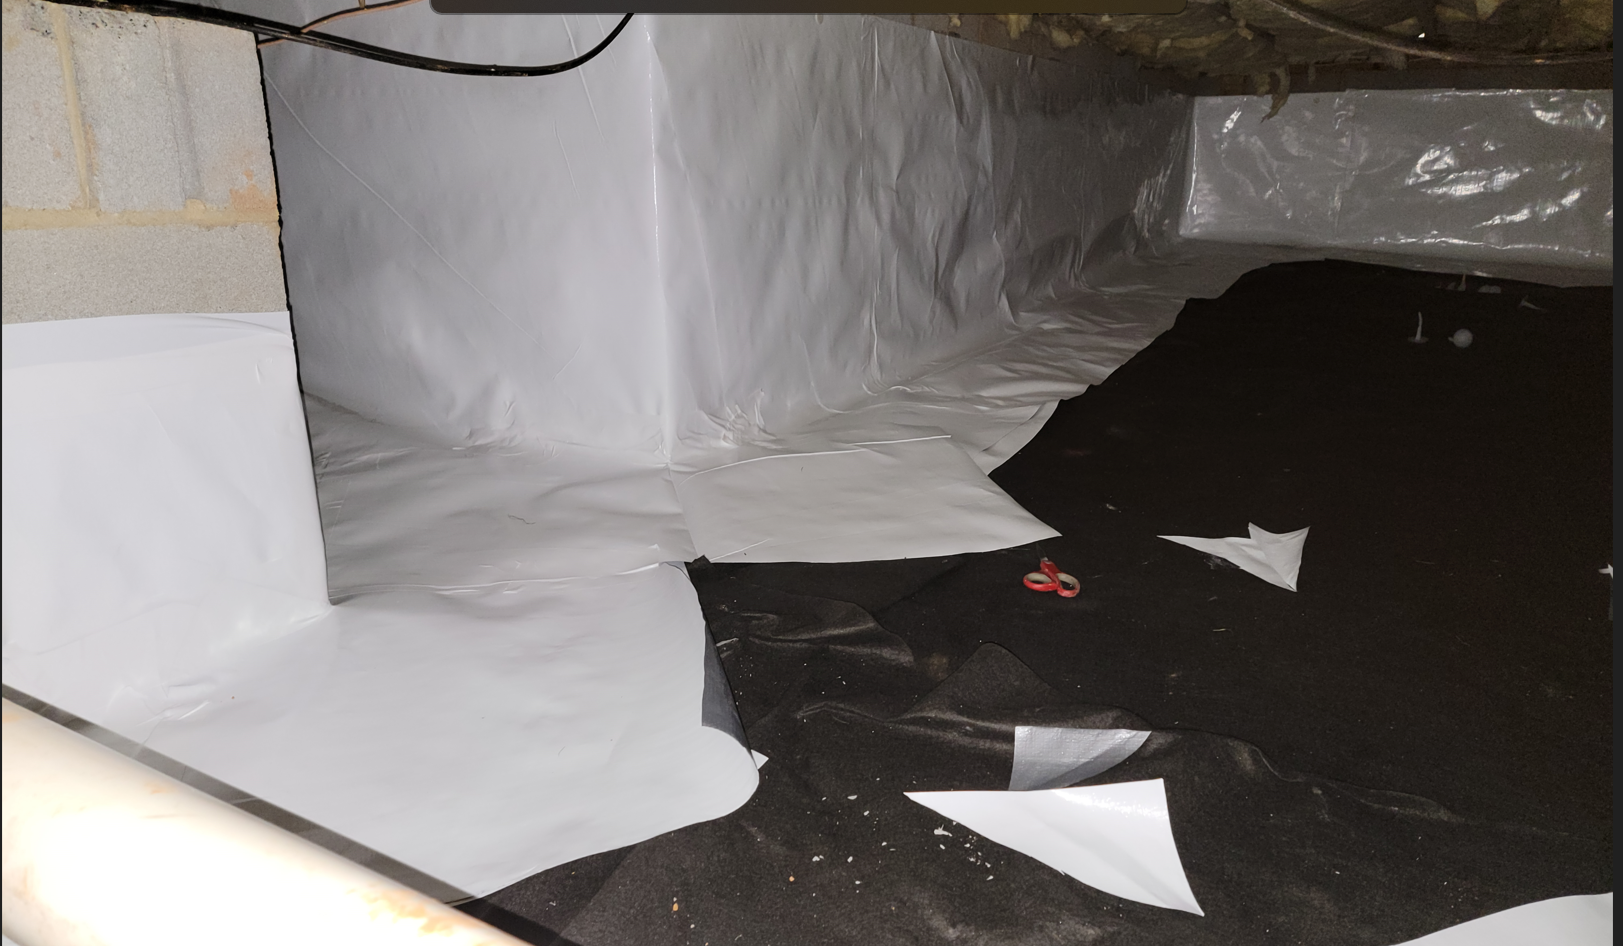
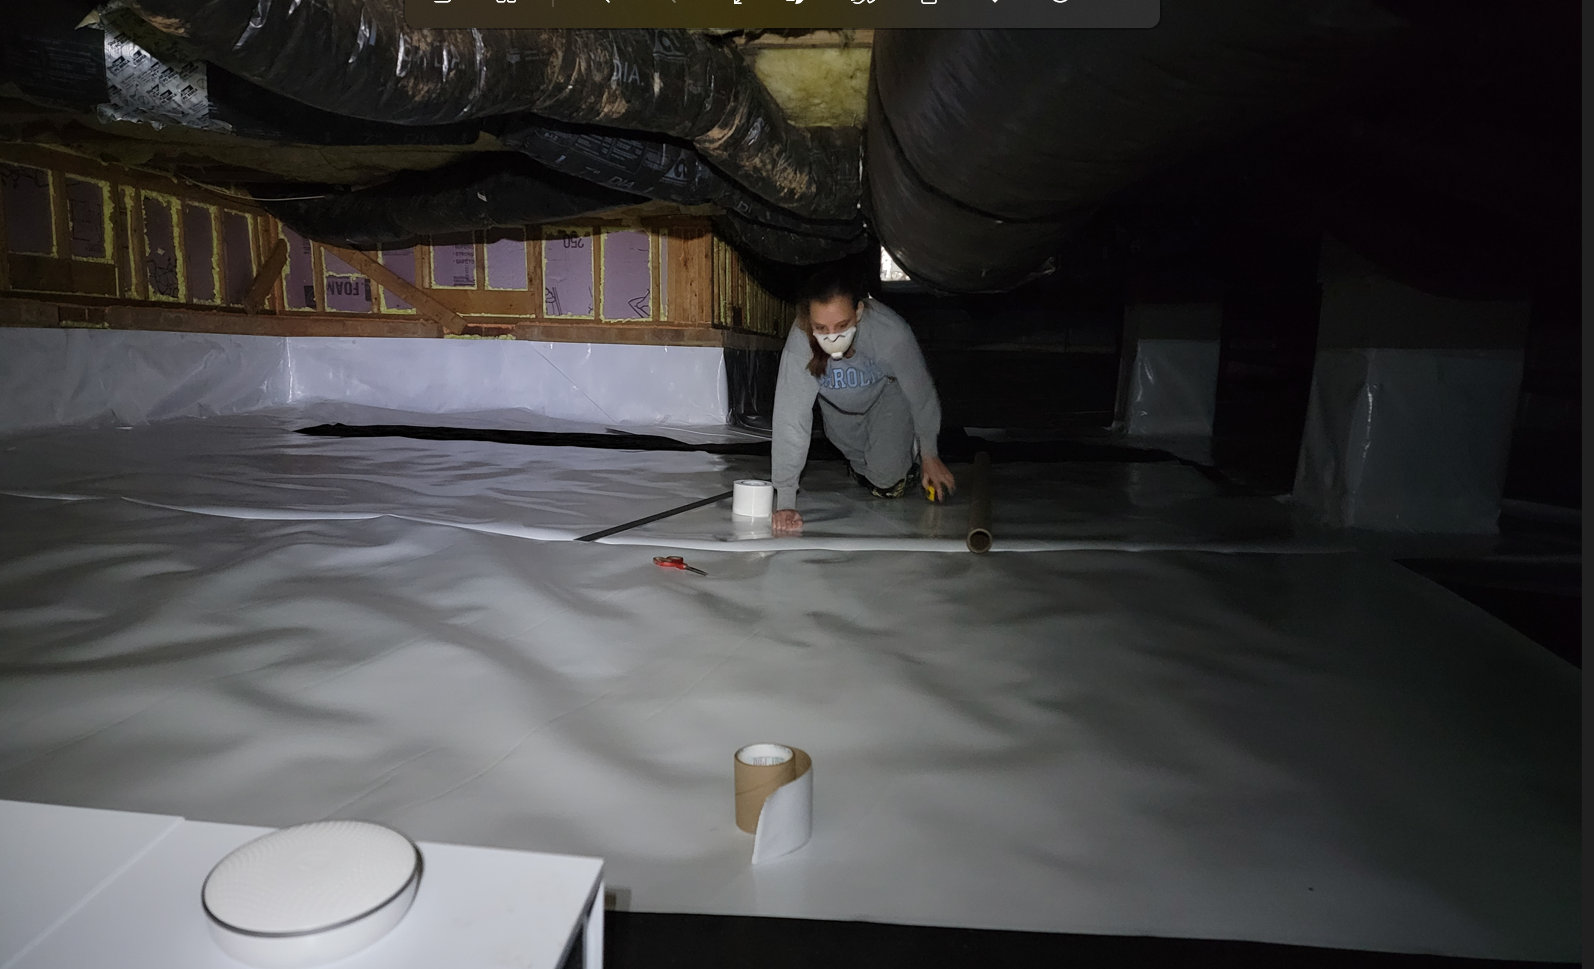
Once I got all the felt down, I showed my wife the progress and she was impressed. it was coming along pretty nicely and almost felt livable down there at this point. Now to lay down the vapor barrier. You can do the walls or do the columns. Didnt matter but i did the walls first cause I had built up the courage at this point to use the hammer drill on the foundation and wanted to get it over with. This is where a helper would really benefit (my wife). I could probably have done this myself but laying out the barrier along the way and getting it straight would be far harder without someone to hold the other end. In my state, you must have a termite inspection gap at the top of three inches. So i used a tape measure and a marker to mark a few spots and prop up the barrier. I think it helped the barrier for the wall was 12mil since it was so thick it propped itself up for the most part. This is where evening out the dirt along the bottom walls really helps in making the barrier straight. In my state, you must have a 6 inch overlap of vapor barrier pieces so each piece on the wall overlapped by about 10 inches (overkill again) and ran down the wall, down the floor about 15 inches. It was overkill but helped when laying down the floor vapor barrier and not having to worry about not meeting code. Add a ton of construction adhesive then take something flat and thin like a piece of 2×4 and push against the barrier where the adhesive is at to make sure to get the barrier flat up against the glue as much as possible.
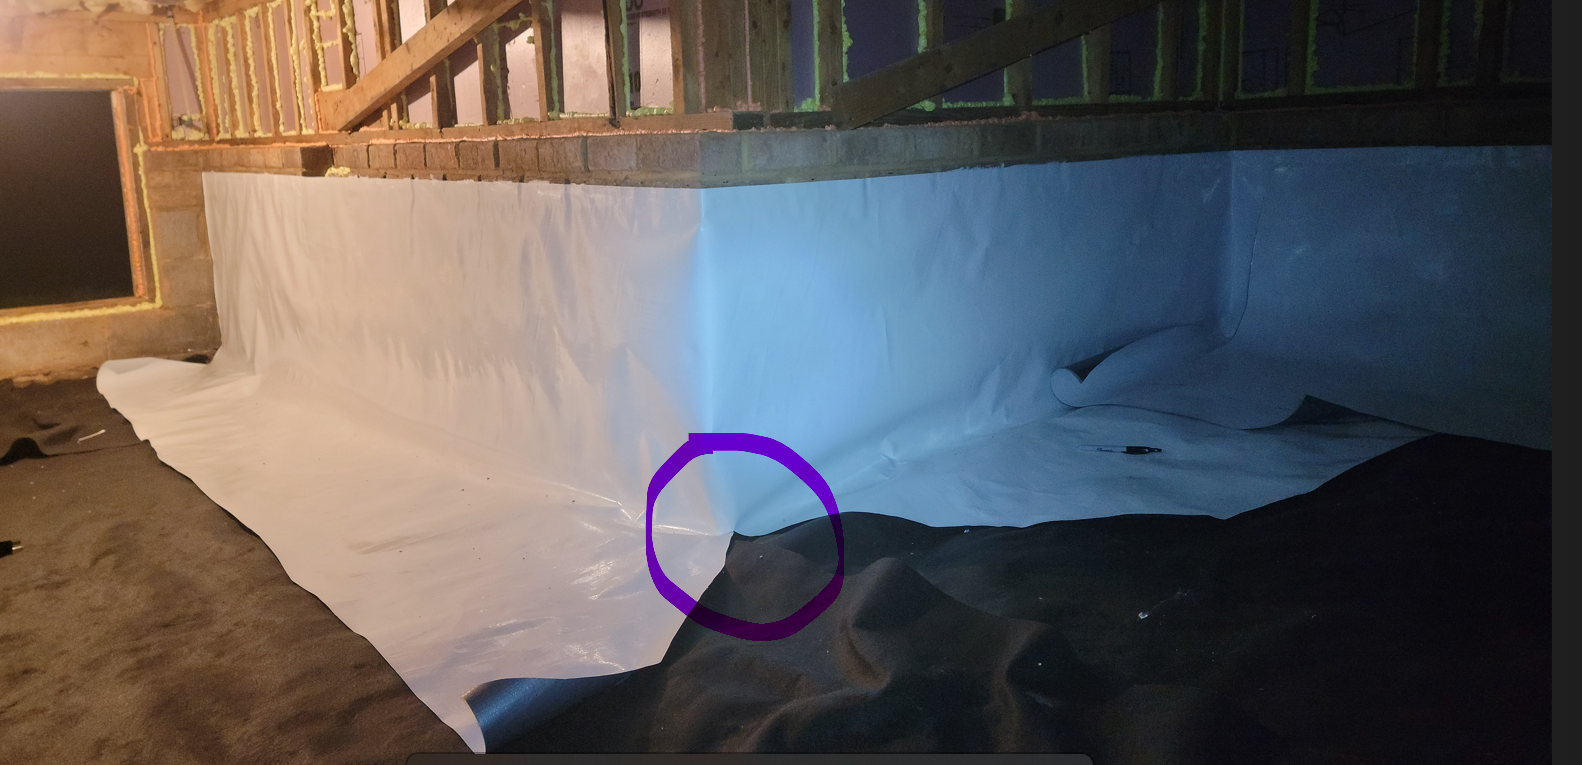
So this is where it starts getting tricky. I looked up ways to go inside and outside corners but couldnt find much on something so specific. On inside corners you want to cut the barrier at a 45 degree angle right up to the corner. This allows you to over lap the two cut sides to go around the corner. You can see in the first image below the overlap from the right side on top of the left side of the barrier. For outside corners (second image) you want to do the same cut at a 45 degree angle up the corner and wrap the barrier around the corner. Then cut a piece out thats about 6×4 (probably could do smaller but i did everything overkill) and cut a slit down the middle about 12 inches and but the slit up against the corner. you can see my crude purple marker shows where the cut is and how to but it against the corner wall in the last picture below. I put a bunch of vapor barrier tape around this piece on the corner to hold it in place. The main concern was getting that 6 inches overlap minimum but i did around 10 inches just to not worry about it.
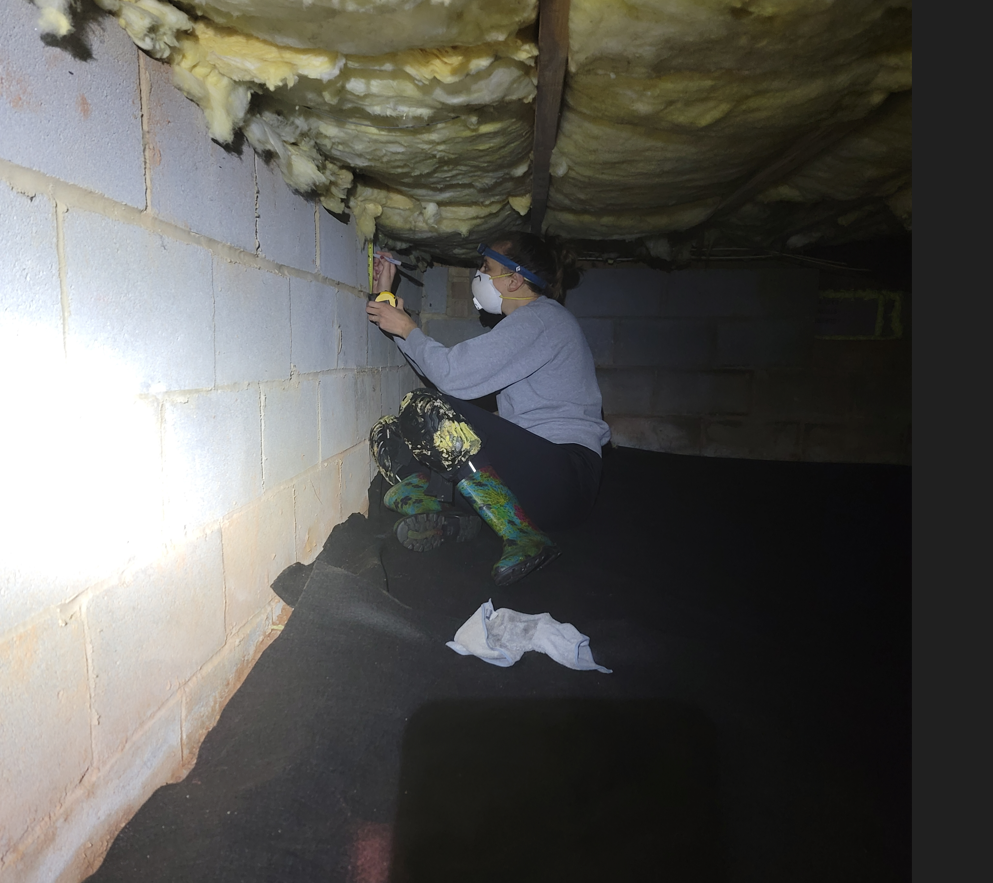
Once the construction adhesive was dry, i needed to use the hammer drill to make holes in the foundation and push the foundation pins in. I cant remember what size bit i used but just match up the size of the foundation pin with the bit needed. I read you need to push pins in every 2-3 feet but i was still nervous about drilling holes so started with every 4 feet but once i drilled in a few hole i realized this was a piece of cake. I did eventually start drilling holes every 3 feet but i think every 2 feet would have perfectly fine. One suggestion i did read as try to drill the holes so they are 1/3 or 2/3 horizontally block so you dont hit the side of a cinder block or the middle where the inside dividers are. Having the 3 inch termite gap helped me know where to align the pins. It was loud so wear ear protection and push hard about 3 inches. Then tap the foundation pins in with a mallet.
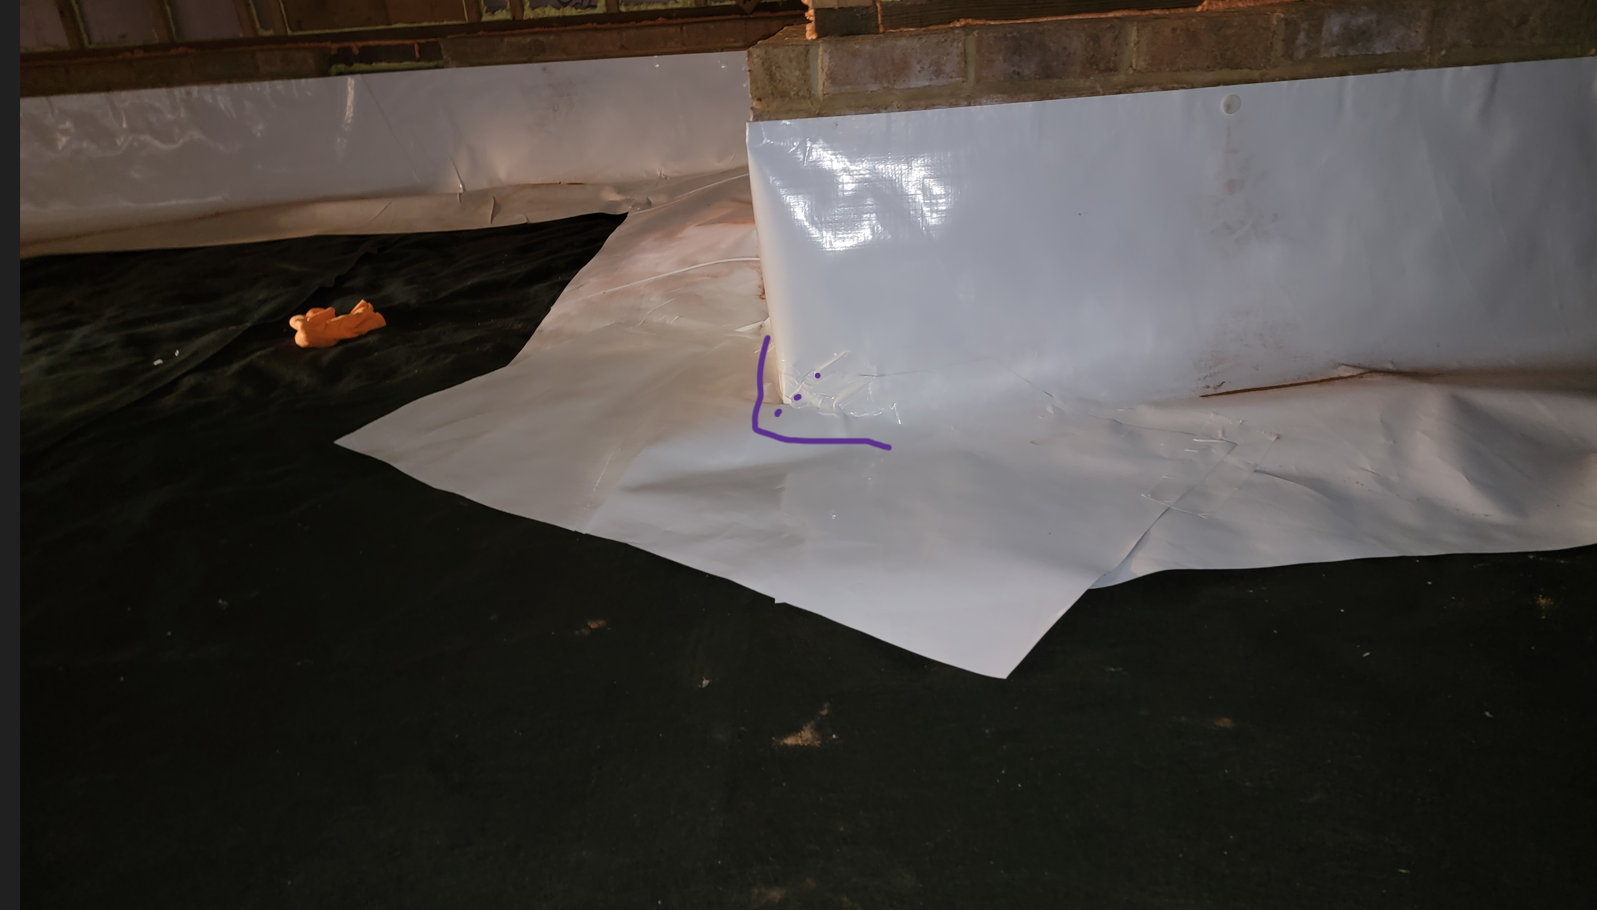
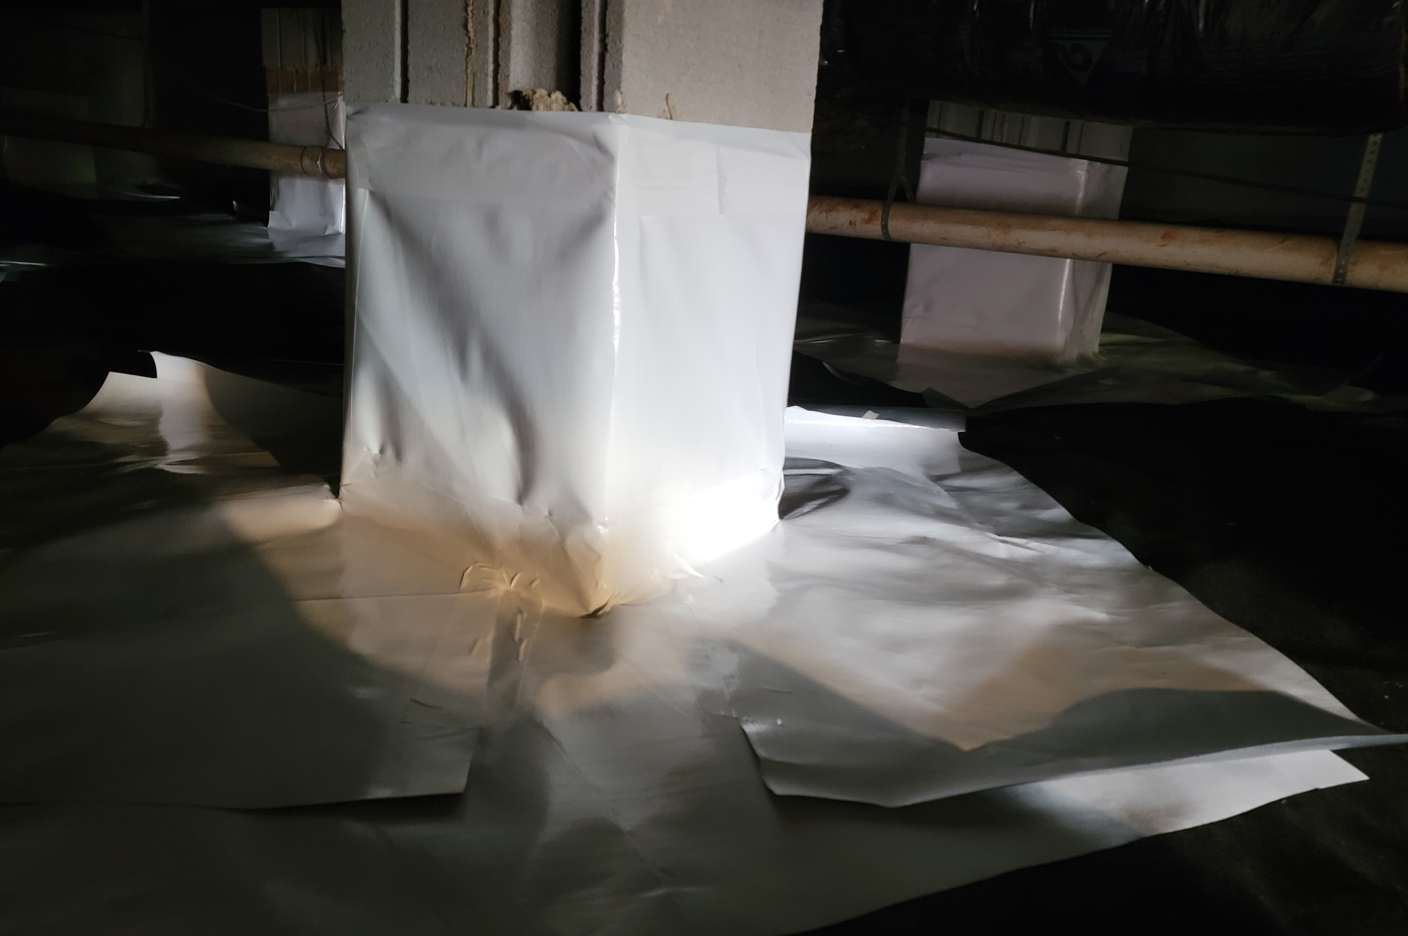
Once the walls are done all the way around the hardest part is doing the columns. This is just like the outside corner only 4 of them back to back. The first image is a little blurry unfortunately but you basically cut a piece thats long enough to wrap around the entire column and overlap by at least 6 inches and goes down on the ground by 6 inches as well. (I overlapped by about 10 inches for both). Start on one side and bend the entire piece so you can have it laying flat up the column and down on the floor. I think you only need to do 6 inches upo the column but I had a good bit of 12mil barrier left so went up about 24 inches. Cut in a 45 degree angle up the first corner like you would do an outside corner and wrap the rest of the piece around the second wall. keeping it tight is important so glue/tape the first vertical edge against the column itself. Cut a 45 degree angle again at the second corner and wrap around. Its super important to keep this as tight as you can so the bottom corners completely cover and are laid out flat when you lay the flooring. Go all the way around the column and tape the other vertical end piece onto the beginning section. Once you are satisfied, Use a good bit of tape to tightly tape the top horizontal part air tight to the column. You can see the tape wrapped around the top on the second image below.
Once you have the column itself wrapped, just like the outside corners, cut a 6x4ft piece and 12 inch slit down the middle and but it against each corner. You’ll need 4 pieces for each pillar. Get everything flat and tape it all down with copious amounts of tape (at least thats what i did). You can see below the finished product where the entire column base is wrapped up pretty good with at least 6 inch overlap on each piece. I had 13 columns so this took a while but precutting a ton of pieces helps. I had my wife cutting all the pieces and i was putting them on the columns. You can see in the second image below a few of the columns all wrapped up tight. It was hard to get it perfectly straight but its a crawlspace and im happy with the results. Some columns like in the third picture below where near the wall so i cut out some extra pieces to connect the wall and column together to get that 10 inch overlap.
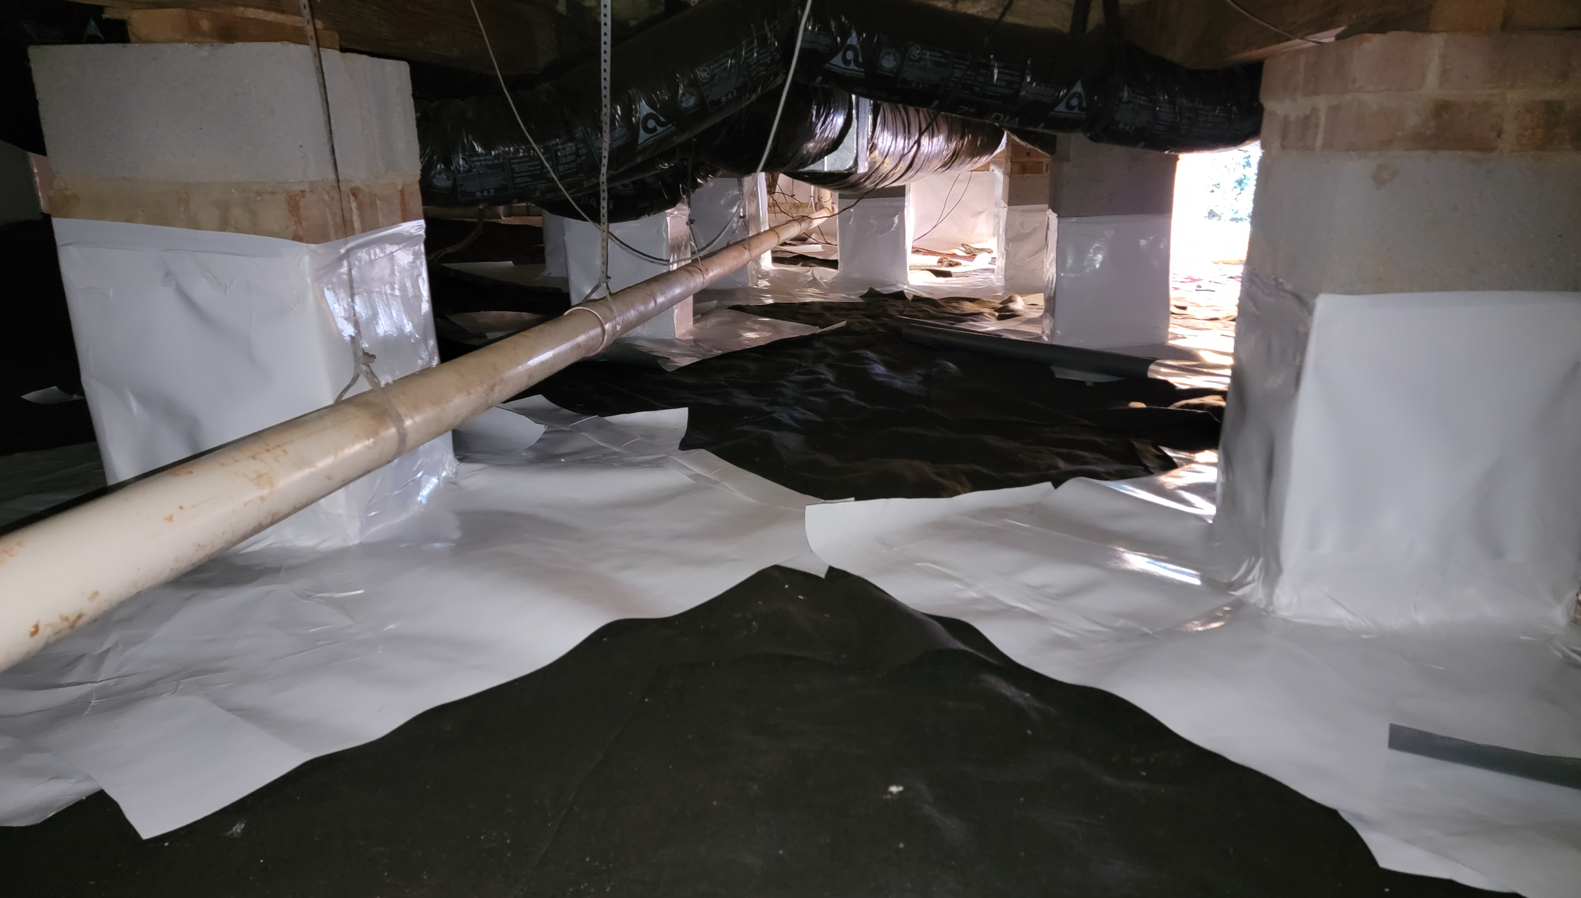
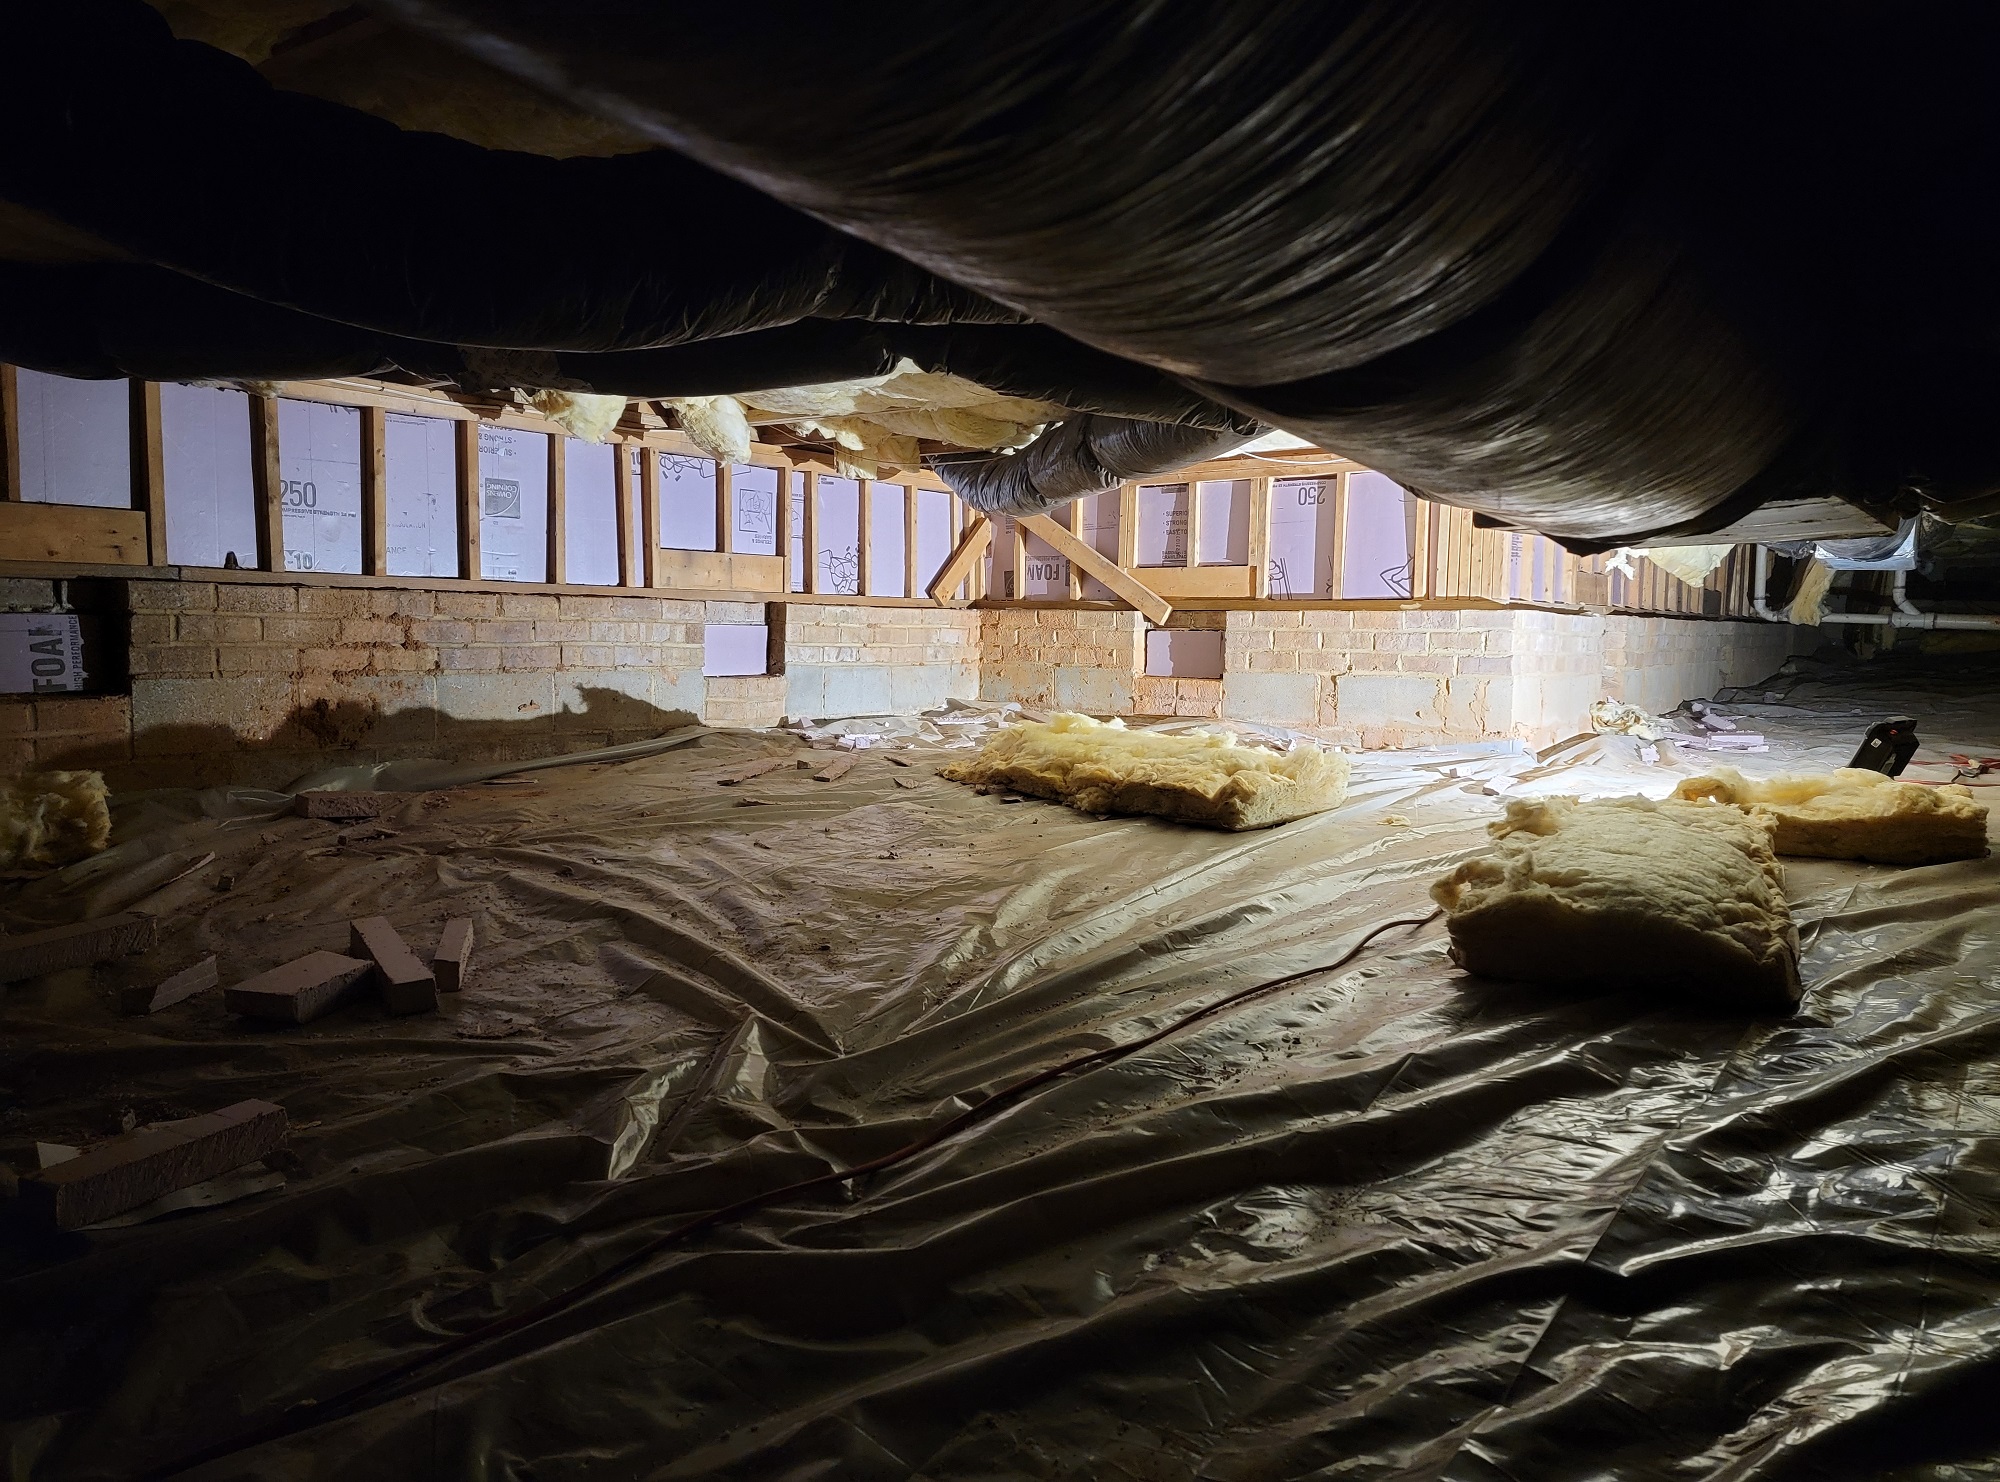
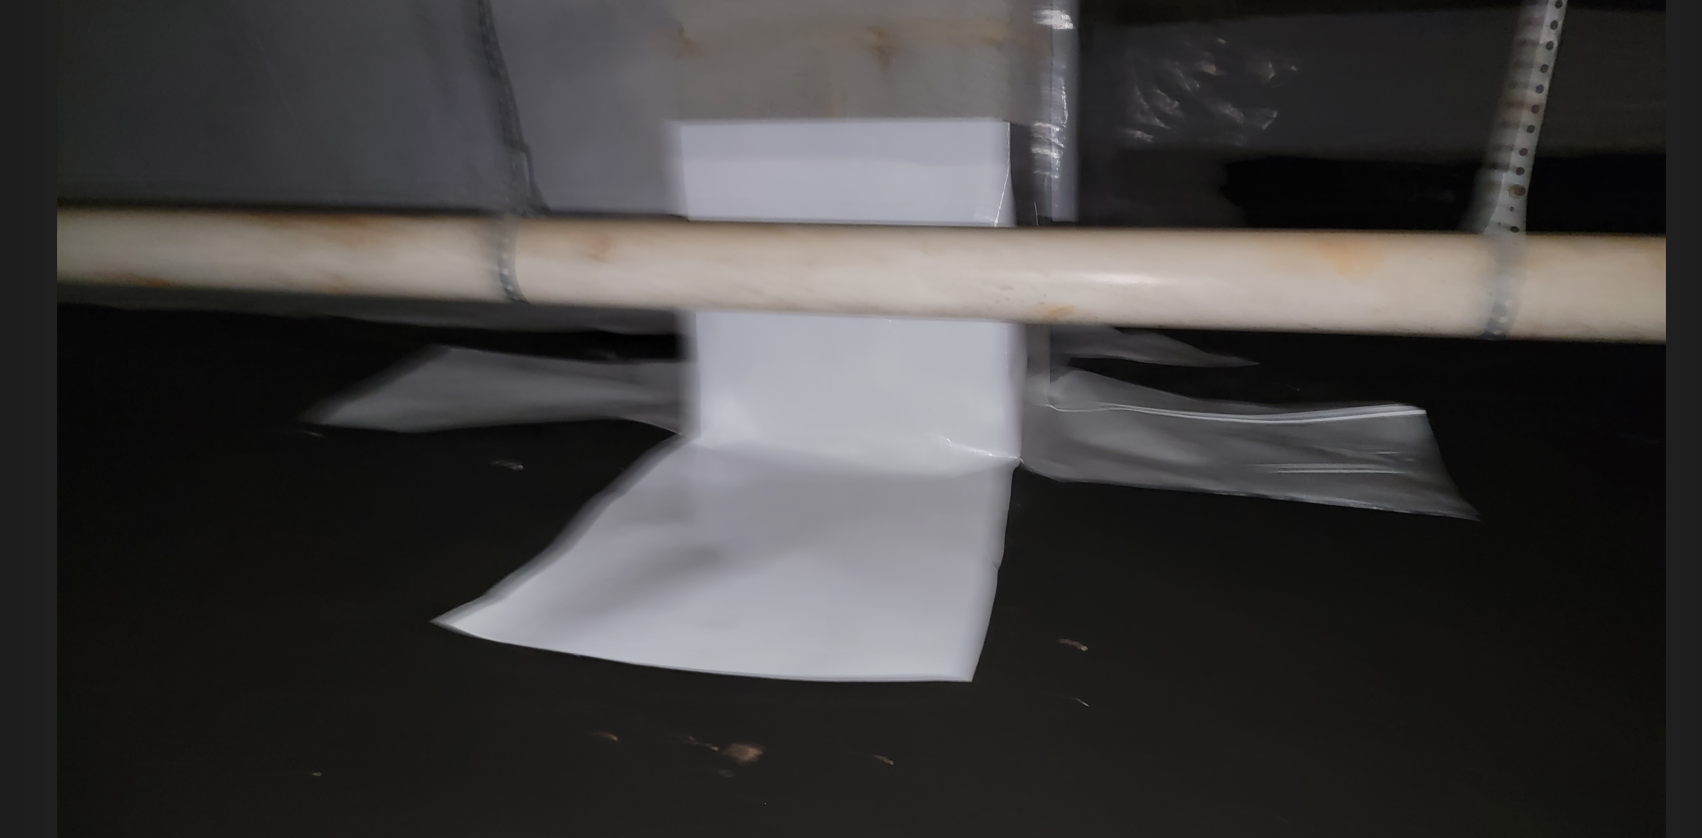
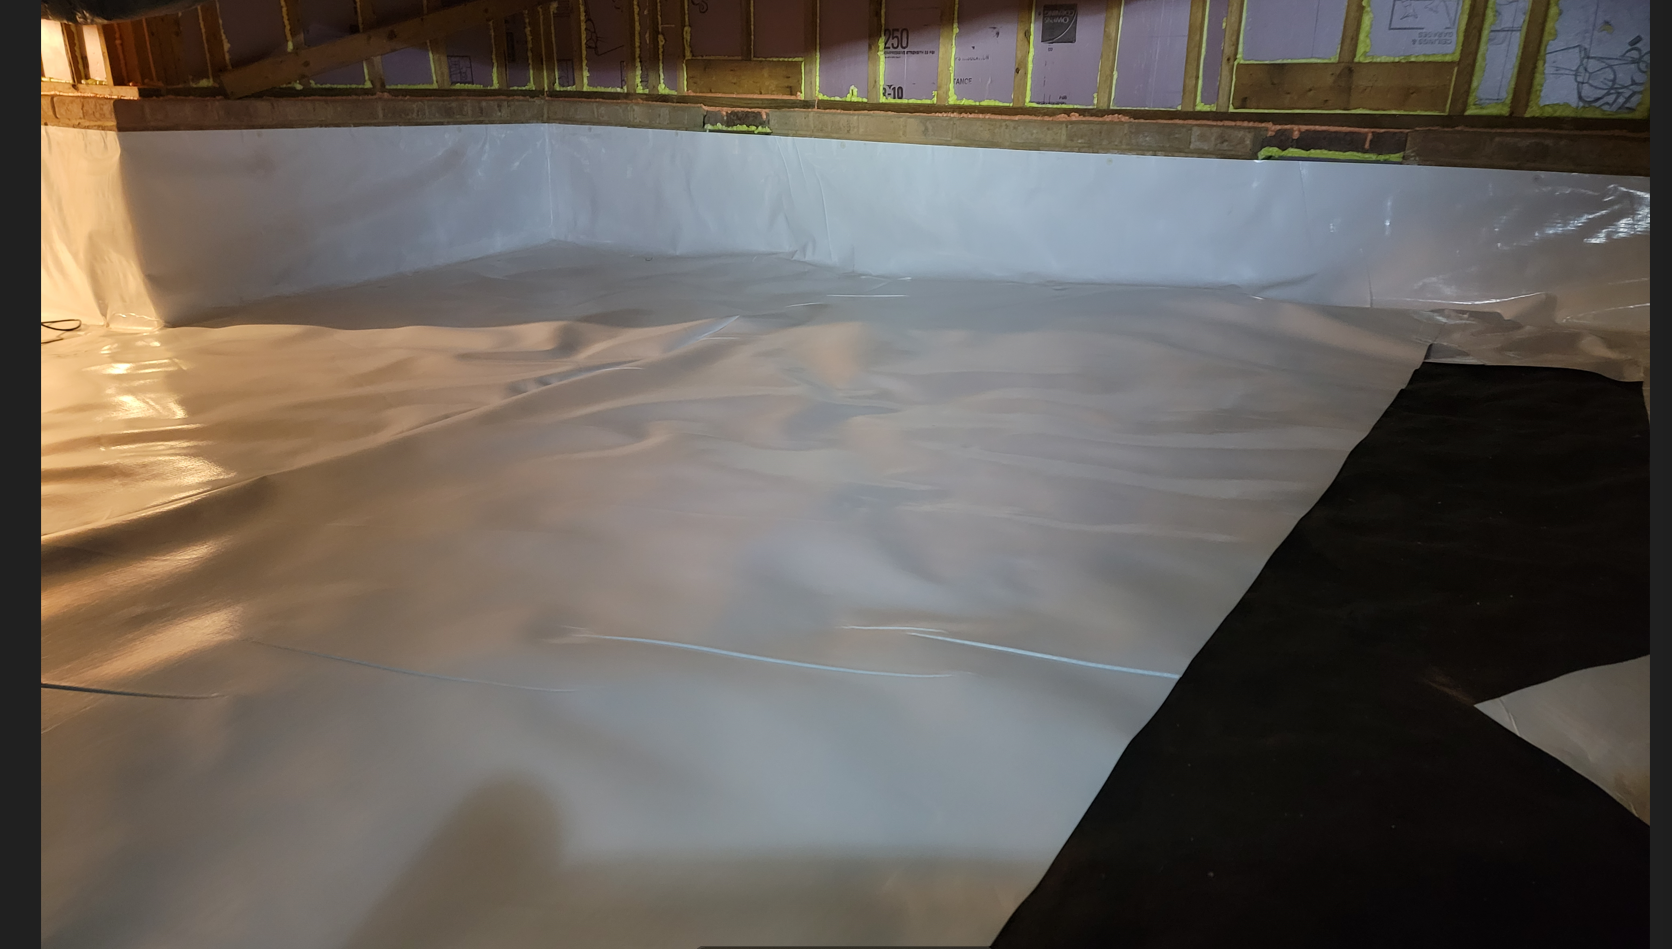
Im at the home stretch here. Laying out the barrier for the floor was the next step. I used 20 mil which is insane overkill but im sure with the felt under it to protect it, this stuff will outlast the house itself. I did the same things with the felt, I tried laying out large pieces as much as possible without cutting. You can actually see the dehumidifier in the last picture because without the original vapor barrier, it was getting pretty humid in there and i didnt want it to be a swamp down there while i finished up. Because I left so much space on the floor from running the barrier down the wall, I didnt have to worry too much about getting the floor barrier right up against the wall. The most important part was making sure to get the wall barrier as flat as possible where the wall meets the floor cause it easy to pull the barrier off if it’s coming up.
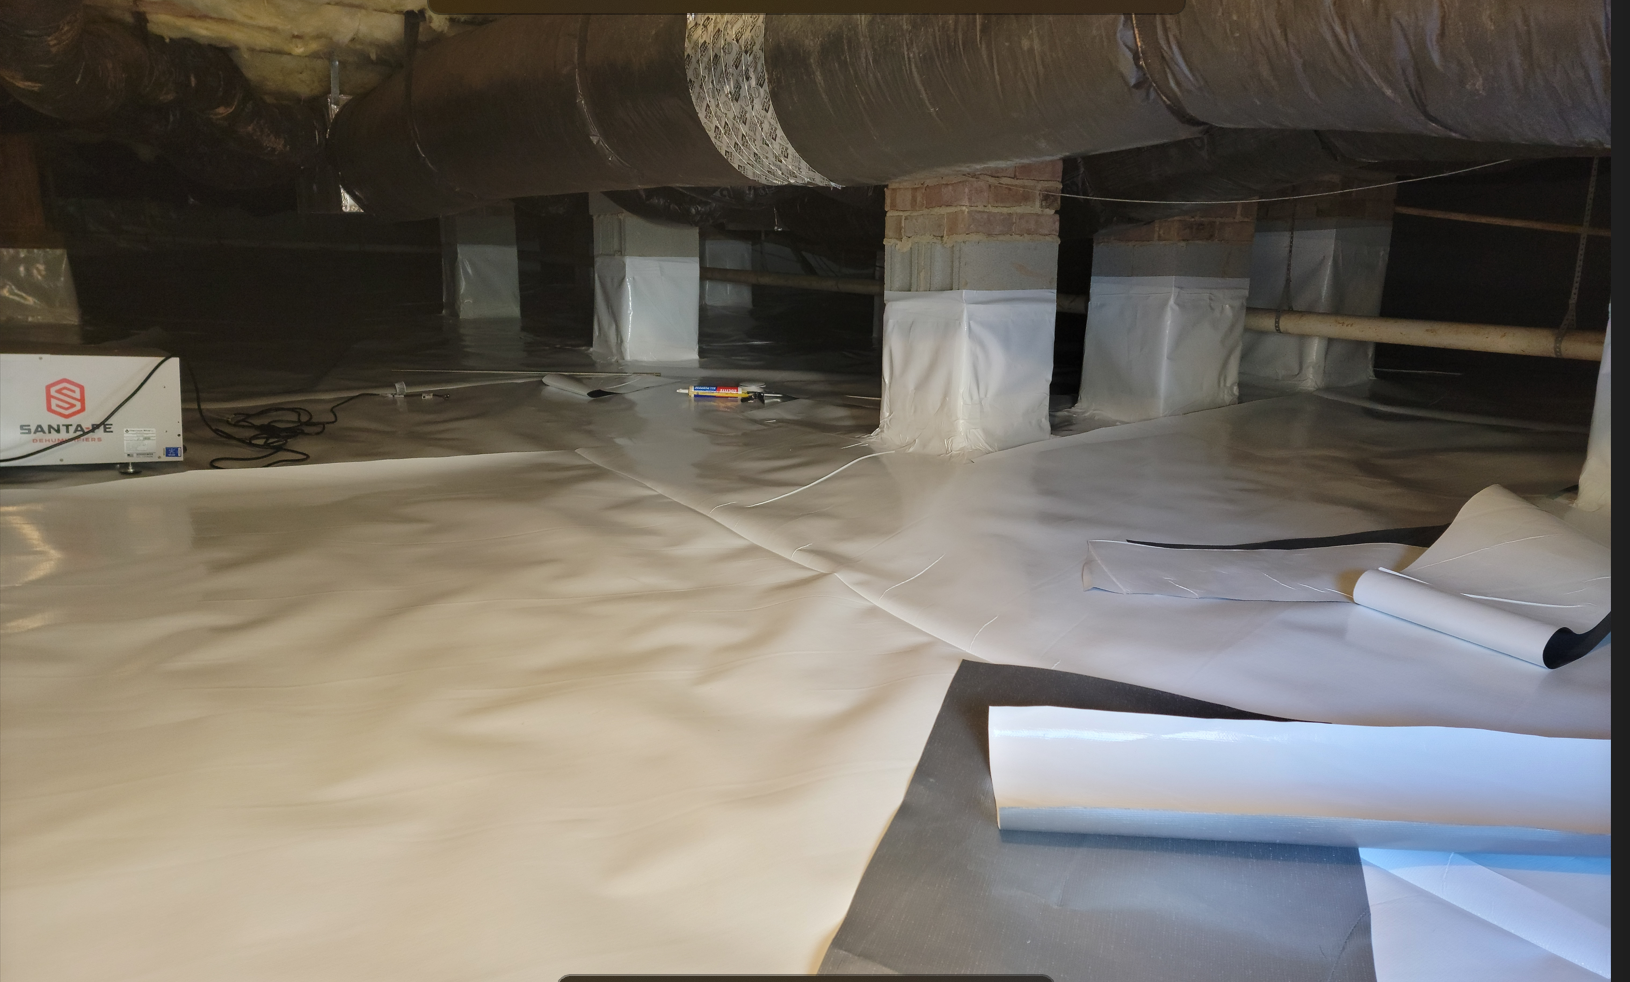
Last thing to do was get the dehumidifier situated. I had already installed it because the crawlspace was getting really damp after i removed the old barrier but its basically the last step. I tapped into the light switch and got a GFCI combo outlet and switch. I also got some cinder blocks, smaller extension cord, and some extra tubing to extend the water drain. The crawlspace naturally sloped to a certain corner and had a drain hole in the concrete to outside so i ran the tube down into that hole. The instructions for the dehumidifier required a p-trap for air to not go back up into the system and i used some HVAC duct tape to create the p-trap. Im sure there are better ways to do this but at this point i was ready to be done. I had ran out of tape and had to wait 3 days for another roll to get here and that really drained my motivation to finish up.
I finished up the area around the door and added insulation to the door. I had two pieces left so combined them together. I also added insulation around the dooor frame and made a pretty tight seal when the door closed. A few weeks later I can back drown with some extra spray foam and liquid nails and patched up some areas that i missed.
Overall this was one hell of a project. Using spray foam instead of foam boards would have been faster but I’m glad I used the board as it looks nicer and we’ve been thinking about rebuilding the deck so will unfortunately have to tear some of the foam off to get to the inside rim joists where the deck is. I do wish i used a circular saw to cut the foam boards as that would have saved me about a week probably. I also wish I spend more time leveling out the dirt along the wall and corners. Finally make sure you have enough tape and more than enough supplies. At least for me, when I ran out of tape, it was so hard to regenerate the motivation after having to wait 3 days for the extra tape in the mail. I hope this helped someone a ton on trying this out themselves. It was a massive project, but fully planning this out beforehand really helped to make this come out looking great. I had a crawlspace company come out to take look at something else a few months later and i asked them what they thought of the encapsulation. I was told whoever did it, did a really great job. Very thick barrier, air tight all along the walls and columns, and foam board instead of spray foam (they use spray foam). Was really happy to have professionals tell me it was an awesome job considering it was so easy for me to know where all the imperfections are at (hidden by a massive amount of tape).